

Depending on the version you are using, choose the appropriate installation path below to get MediaHaven running on your self-hosted WordPress site.
💡 Before you begin: Make sure you have administrator access to your WordPress dashboard.
Part 1: Installing MediaHaven Pro (Premium Version)
If you purchased the premium version from mediahaven.io, you will need to upload the plugin package manually.
Step 1: Download your Plugin File
- Log in to your customer account dashboard at mediahaven.io.
- Navigate to your downloads section and download the latest MediaHaven Pro
.ziparchive file to your computer. - Locate your unique license key (you will need this after activation).
Step 2: Upload to WordPress
- Log in to your WordPress Admin Dashboard.
- Go to Plugins > Add New.
- Click the Upload Plugin button located at the very top of the page.
- Click Choose File, select the downloaded
mediahaven-pro.zipfile, and click Install Now. - Once the upload finishes, click the blue Activate Plugin link.
Step 3: Activate Your License Key
- Navigate to the new MediaHaven Pro menu in your sidebar and click Account.
- Paste your license key into the designated field and click Activate License to unlock automatic updates and premium features.
Part 2: Installing MediaHaven Lite (Free Version)
If you are using the free version, you can install it instantly without leaving your WordPress dashboard.
Method A: Automatic Installation (Recommended)
- Log in to your WordPress Admin Dashboard.
- Navigate to Plugins > Add New.
- In the top-right search bar, type
MediaHaven. - Locate the plugin in the search results and click Install Now.
- Once installed, click Activate.
Method B: Manual ZIP Installation
- Download the plugin package from the official repository: MediaHaven Lite on WordPress.org.
- In your WordPress dashboard, go to Plugins > Add New > Upload Plugin.
- Upload the
mediahaven-lite.zipfile and click Install Now. - Click Activate Plugin.
Next Steps
Immediately after clicking Activate, MediaHaven will automatically redirect you to the interactive setup wizard screen to quickly configure your video essentials.
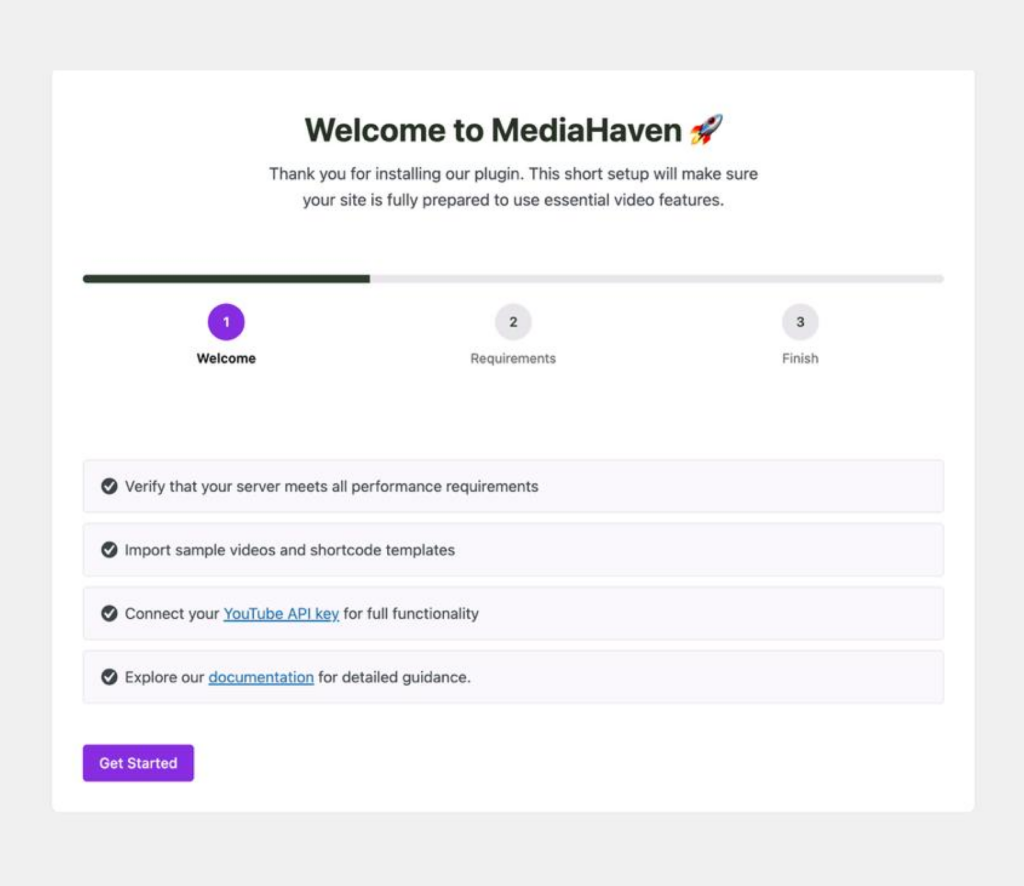
- Launch the Onboarding: On the Welcome screen, click the purple Get Started button to initiate the automated process.
- Review Requirements & Data Import: The wizard will automatically guide you through:
- Server Check: Verifying your system meets all baseline performance requirements.
- Demo Import: Importing a collection of sample videos and pre-generated shortcode gallery templates so you don’t have to start from scratch.
- API Integration: Providing a quick connection option for your YouTube API key to activate full external streaming capabilities.
- Finish Setup: Once the progress bar fills up, your workspace is fully prepared.
💡 Manual Access Note: If you ever need to revisit this wizard or adjust these core components later, simply navigate to the left-hand WordPress sidebar menu and click MediaHaven Pro (or MediaHaven Lite) > Setup.
💡 If you plan on using advanced integrations—like replacing product images or adding video tabs to e-commerce stores—ensure your WooCommerce plugin is installed and running beforehand!
Prefer visual learning? Watch the video tutorial to see how it works.