

Build a beautiful video gallery using videos from YouTube, Vimeo, TikTok, Facebook, Instagram, LinkedIn, Twitch, Wistia, Dailymotion, Rumble, HLS streams, and self-hosted videos—all inside a single responsive gallery.
Whether you’re creating a product showcase, tutorial library, online course, portfolio, or entertainment website, MediaHaven lets you combine videos from multiple platforms into one gallery without writing code.
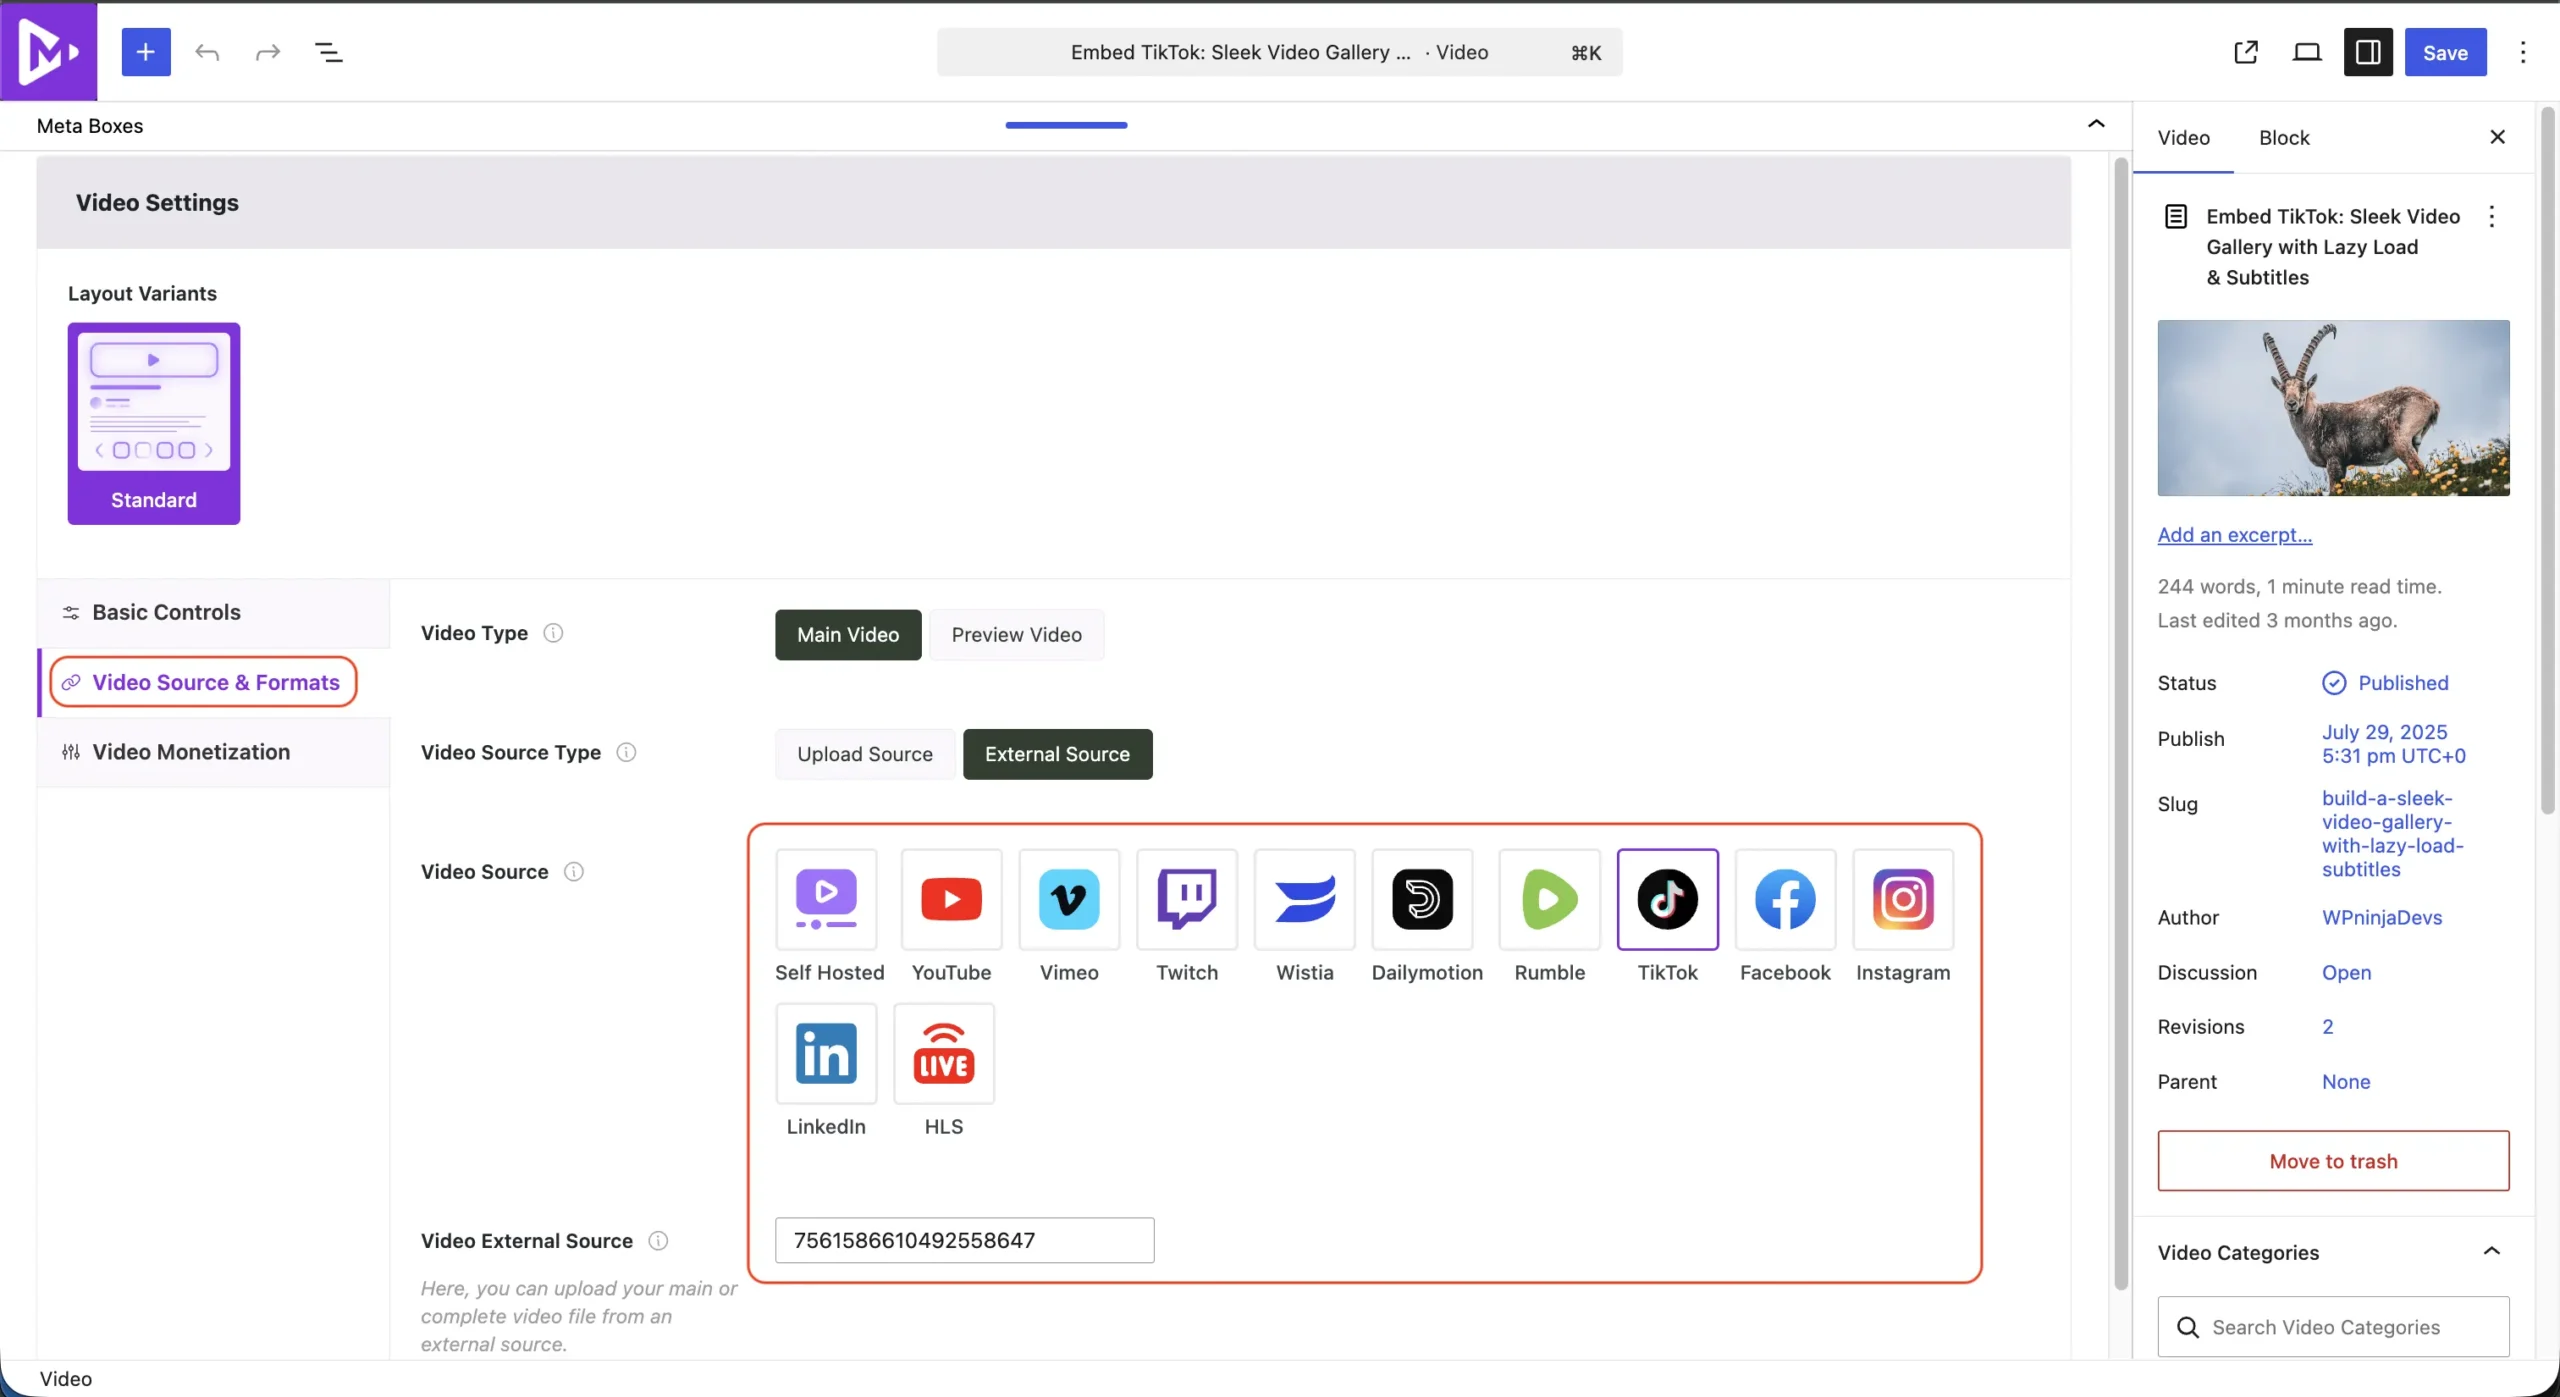
Supported Sources
- Self Hosted Videos
- YouTube
- Vimeo
- TikTok
- Twitch
- Wistia
- Dailymotion
- Rumble
- HLS (.m3u8)
MediaHaven stores every video inside its own video library first, then allows you to display any combination of those videos in unlimited galleries.
Before You Start
Make sure you have:
- WordPress installed
- MediaHaven activated
- At least a few videos ready: Add Your First Video and Configure External Video Sources
Step 1 — Add Your Videos
Every gallery starts by creating videos inside the MediaHaven library.
Go to
MediaHaven → Videos → Add New
You will see the Video Editor.
Upload or connect every video you want to use.
Examples:
- Upload an MP4
- Paste a YouTube Video ID
- Paste a Vimeo ID
- Add a TikTok video
- Connect an HLS stream
Continue until all videos have been added.
You can mix different video platforms together. For example:
- 2 YouTube videos
- 3 Vimeo videos
- 1 TikTok
- 4 Self Hosted videos
- 2 HLS streams
MediaHaven treats every video as part of one centralized library.
Step 2 — Configure Each Video
Open any video you created.
Navigate to
Video Settings → Video Source & Formats
Here you can choose where the video comes from.
Your options include:
- Self Hosted
- YouTube
- Vimeo
- Twitch
- Wistia
- Dailymotion
- Rumble
- TikTok
- HLS
After selecting a source, simply enter the required Video ID or URL depending on the platform.
For example
YouTube
GzWzo0AXmTgTikTok
7561586610492558647Vimeo
1066526515HLS
https://example.com/video.m3u8Click Publish or Update when finished.
Step 3 — Create a New Gallery
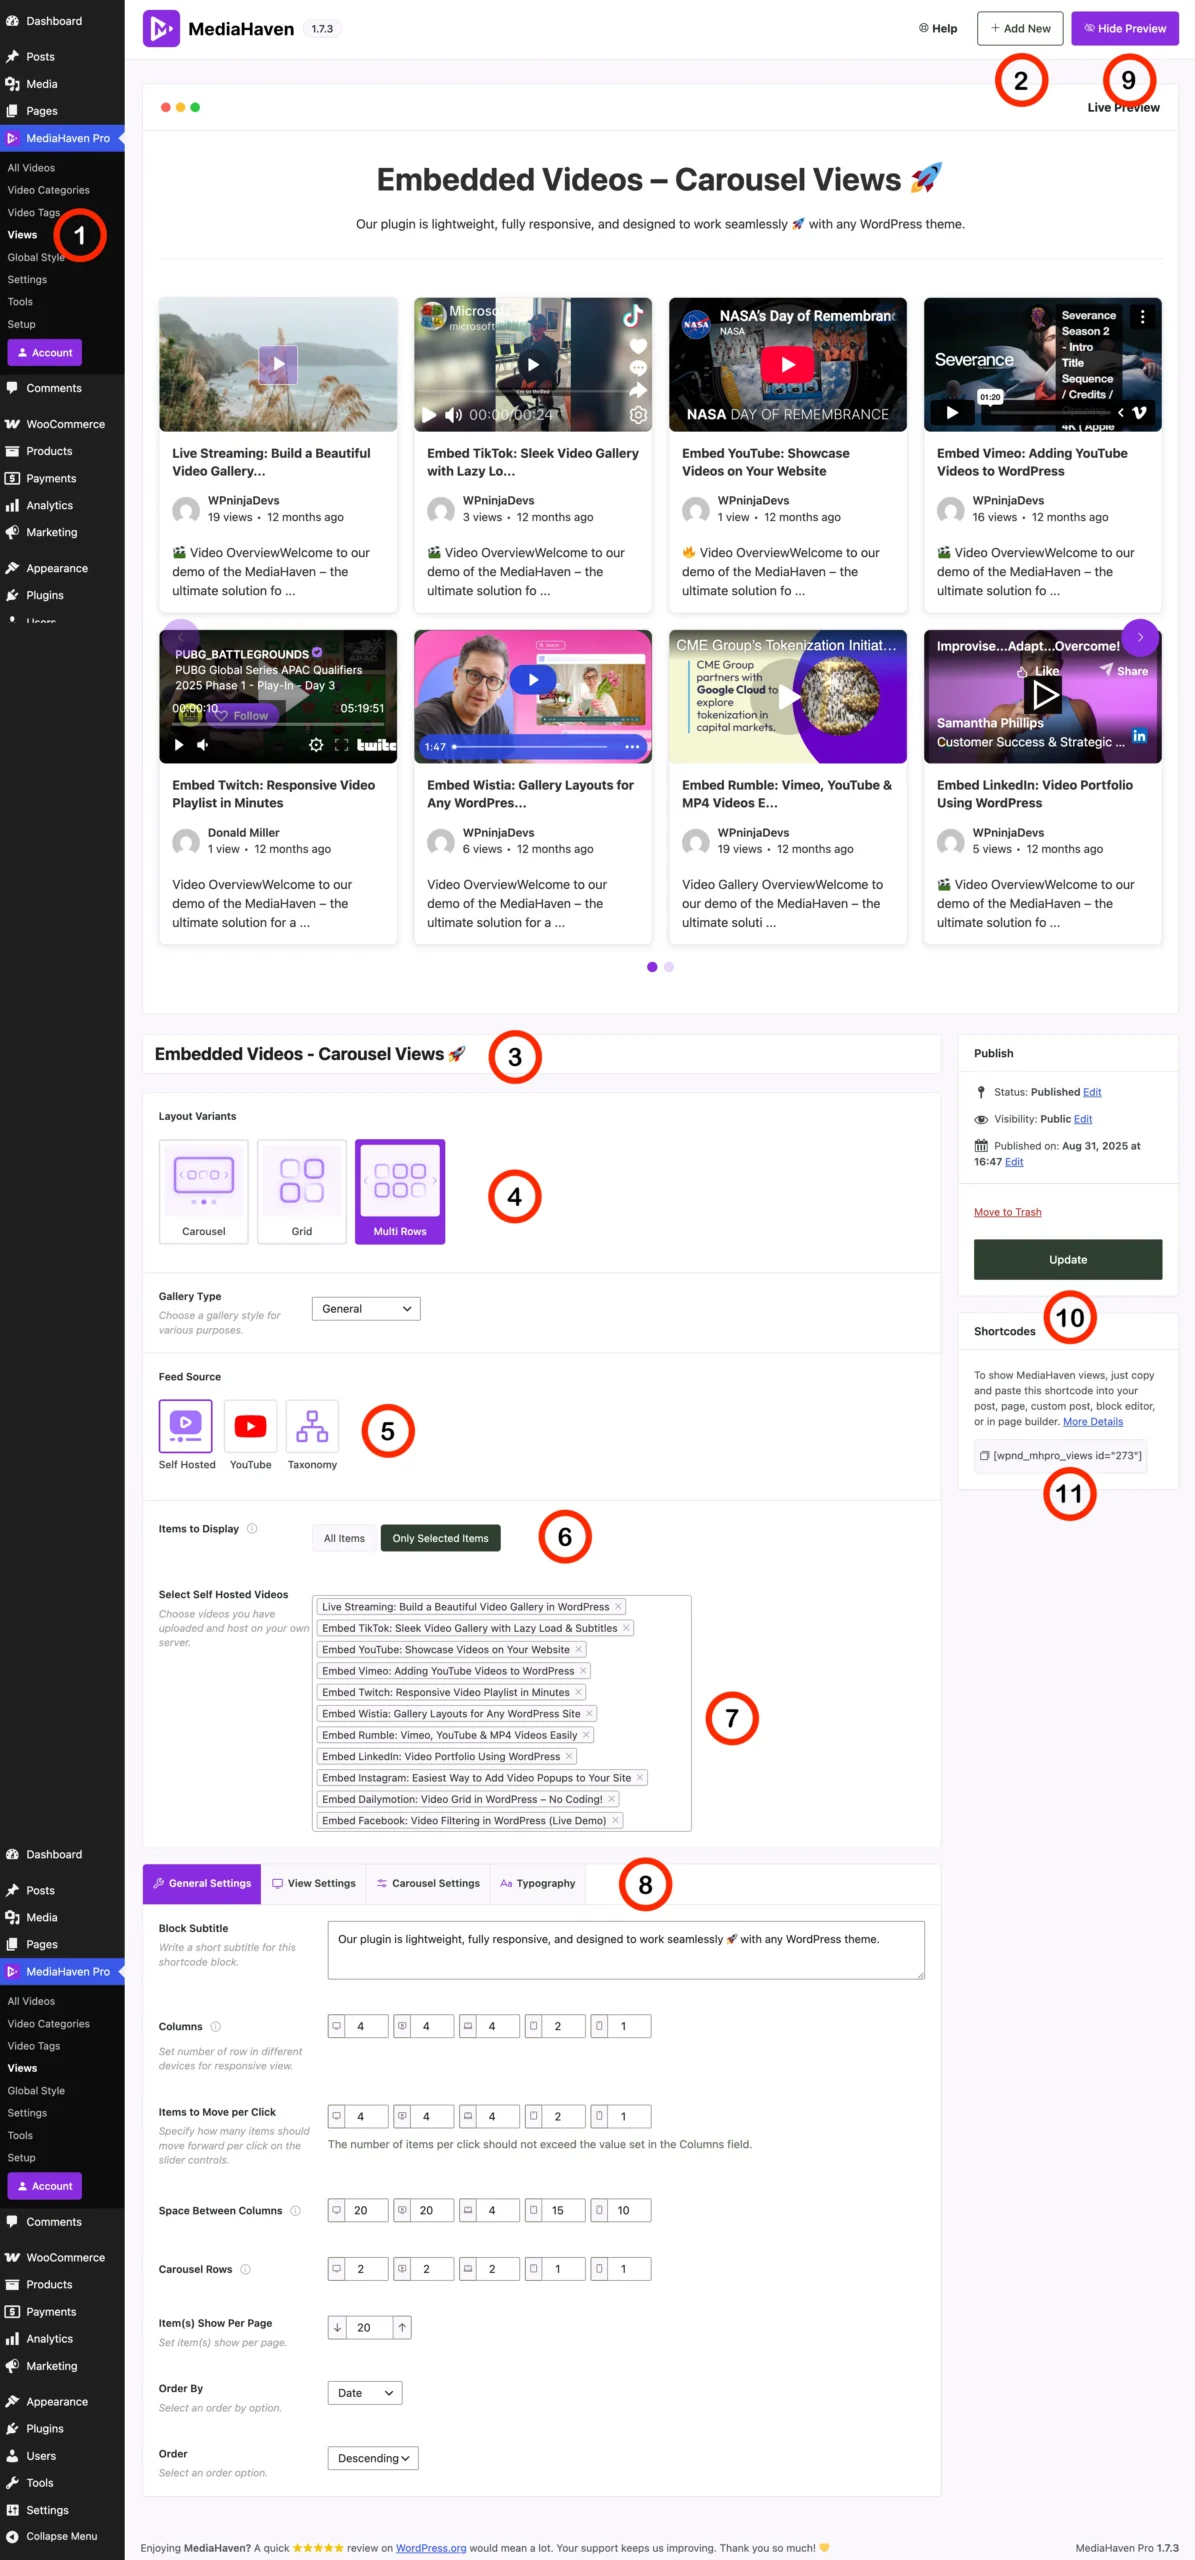
Now that your videos exist, it’s time to build a gallery.
Navigate to
MediaHaven → Views → Add New
A View is a reusable gallery layout.
One View can display:
- one video
- ten videos
- hundreds of videos
without duplicating content.
Step 4 — Choose a Gallery Layout
Under Layout Variants, select the design that best matches your website.
Available layouts include:
Carousel
Displays videos in a horizontal slider.
Perfect for:
- Home pages
- Featured videos
- Product showcases
Grid
Displays videos in multiple responsive columns.
Perfect for:
- Video libraries
- Learning websites
- Portfolios
Multi Row Carousel
Displays multiple rows inside one slider.
Best for:
- Large video collections
- Netflix-style layouts
- Entertainment websites
Step 5 — Select the Gallery Source
Choose where this gallery should load videos from.
Available sources include:
- Self Hosted Library
- YouTube Feed
- Taxonomy
- (Additional sources available in future updates)
If you’ve already added videos into MediaHaven, choose Self Hosted to display your video library.
Step 6 — Choose Which Videos to Display
You have two options.
All Items
Automatically displays every video in your library.
Perfect when:
- New videos are added frequently
- You don’t want to update galleries manually
Only Selected Items
Allows you to hand-pick individual videos.
Click inside the selection box.
Search for videos by title.
Select as many videos as you like.
The gallery will display them in the selected order.
This is ideal for:
- Featured videos
- Landing pages
- Product showcases
Step 7 — Mix Different Video Platforms
This is where MediaHaven becomes powerful.
One gallery can contain:
| Platform | Supported |
|---|---|
| Self Hosted | ✓ |
| YouTube | ✓ |
| Vimeo | ✓ |
| TikTok | ✓ |
| ✓ | |
| ✓ | |
| ✓ | |
| Twitch | ✓ |
| Wistia | ✓ |
| Dailymotion | ✓ |
| Rumble | ✓ |
| HLS | ✓ |
Visitors never notice they’re watching videos from different providers.
Everything appears inside one consistent MediaHaven gallery.
Step 8 — Customize Gallery Settings
The General Settings tab lets you control how your gallery behaves.
You can configure:
Block Subtitle
Display a short description above the gallery.
Responsive Columns
Choose different numbers of columns for:
- Desktop
- Laptop
- Tablet
- Mobile
Items Per Click
Set how many slides move when users click Next or Previous.
Space Between Columns
Control the spacing between video cards.
Carousel Rows
Useful for Multi Row layouts.
Items Per Page
Limit the number of videos displayed initially.
Order By
Sort videos using:
- Date
- Title
- Random
- Menu Order
Order
Display videos in:
- Ascending
- Descending
Step 9 — Preview Your Gallery
Before publishing, click the Live Preview button.
The preview updates instantly so you can verify:
- Layout
- Video order
- Responsive behavior
- Card spacing
- Typography
- Carousel navigation
Adjust any settings until you’re happy with the result.
Step 10 — Publish the Gallery
Click Publish or Update.
MediaHaven generates a shortcode automatically.
Example:
[wpnd_mhpro_views id="x"]Copy the shortcode.
Paste it into:
- Any Page
- Any Post
- Gutenberg Shortcode Block
- Elementor Shortcode Widget
- Classic Editor
- Any shortcode-compatible builder
The gallery will appear immediately.
Result
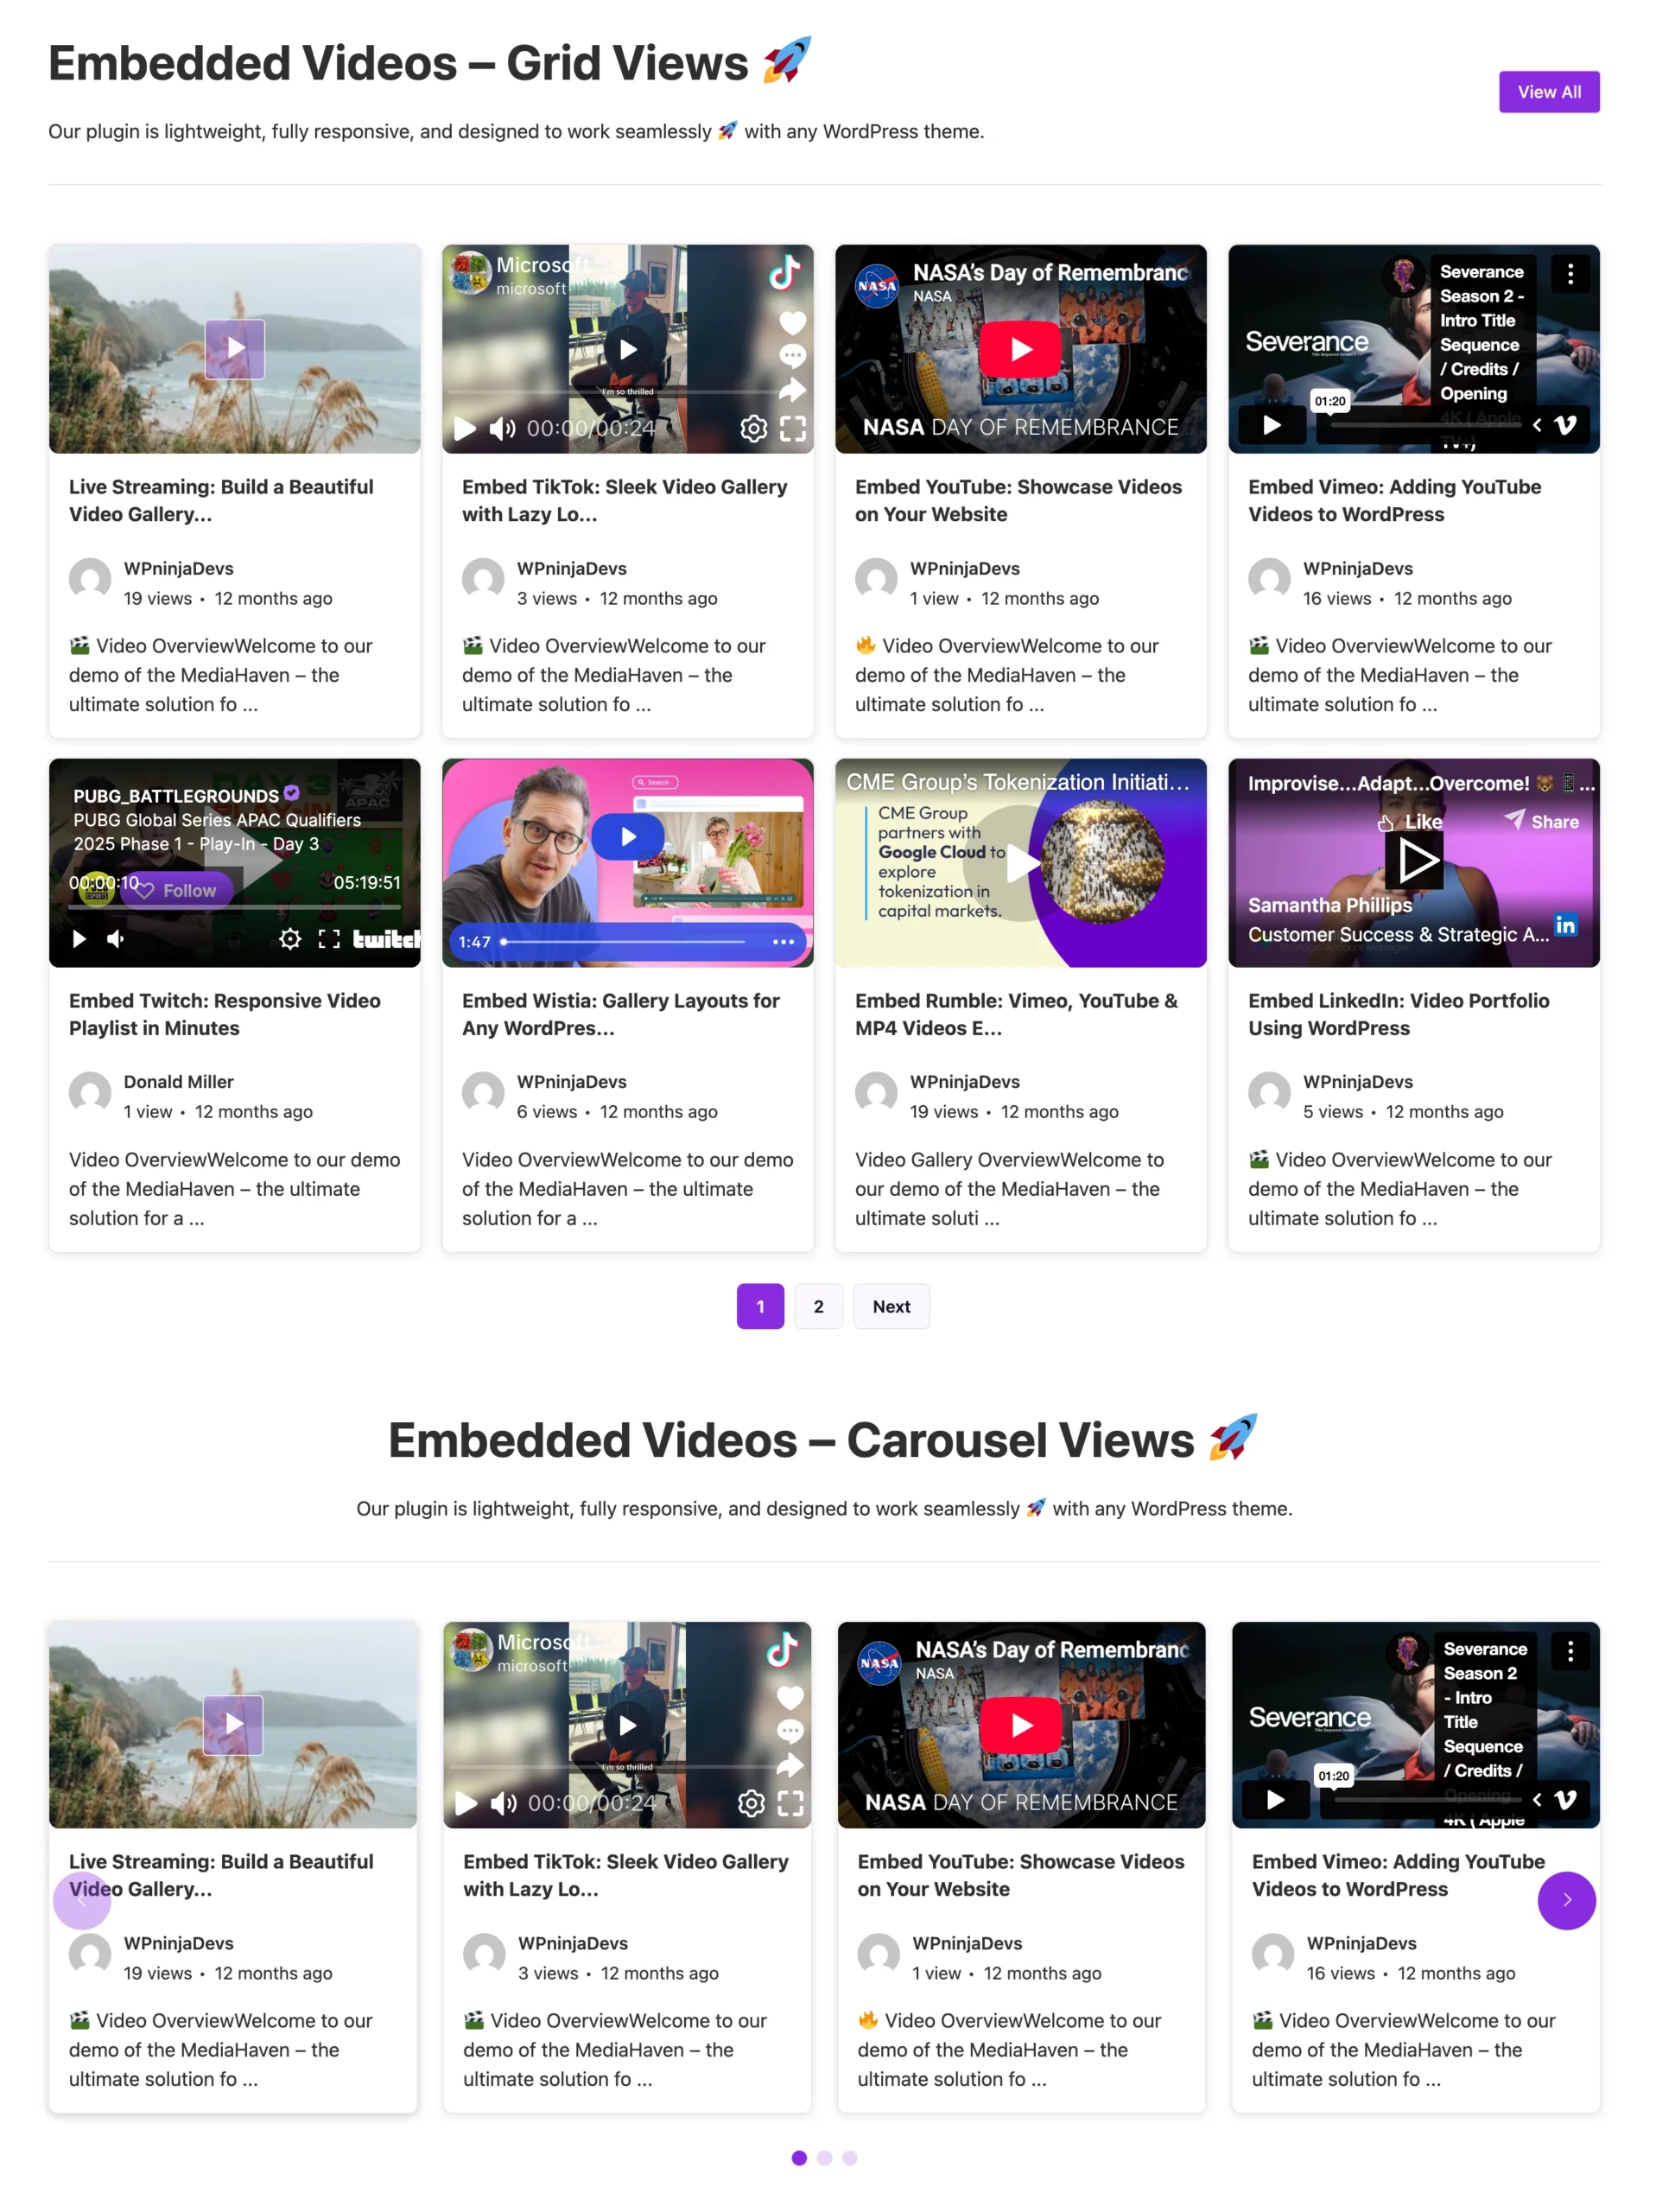
Your visitors can now browse a fully responsive gallery containing videos from multiple platforms inside a single, consistent experience.
MediaHaven automatically handles the correct player for each video source while keeping the gallery layout unified.
Best Practices
- Upload a custom poster image for platforms that don’t provide thumbnails automatically.
- Organize videos with categories and tags if you plan to create multiple galleries.
- Use Only Selected Items for curated content such as featured products or landing pages.
- Choose All Items when building a growing video library.
- Keep video titles descriptive for better SEO and easier searching in the MediaHaven library.
- Use the Live Preview before publishing to verify spacing, layout, and responsiveness.
I also recommend adding “Next Steps” at the end of every documentation page to improve user onboarding: