

⚠️ Prerequisite Notice: Before using any WooCommerce integration features, you must have the WooCommerce plugin installed and activated on your WordPress site. If WooCommerce is missing, the product editing screens and media gallery options shown below will not be available. See Live Demo
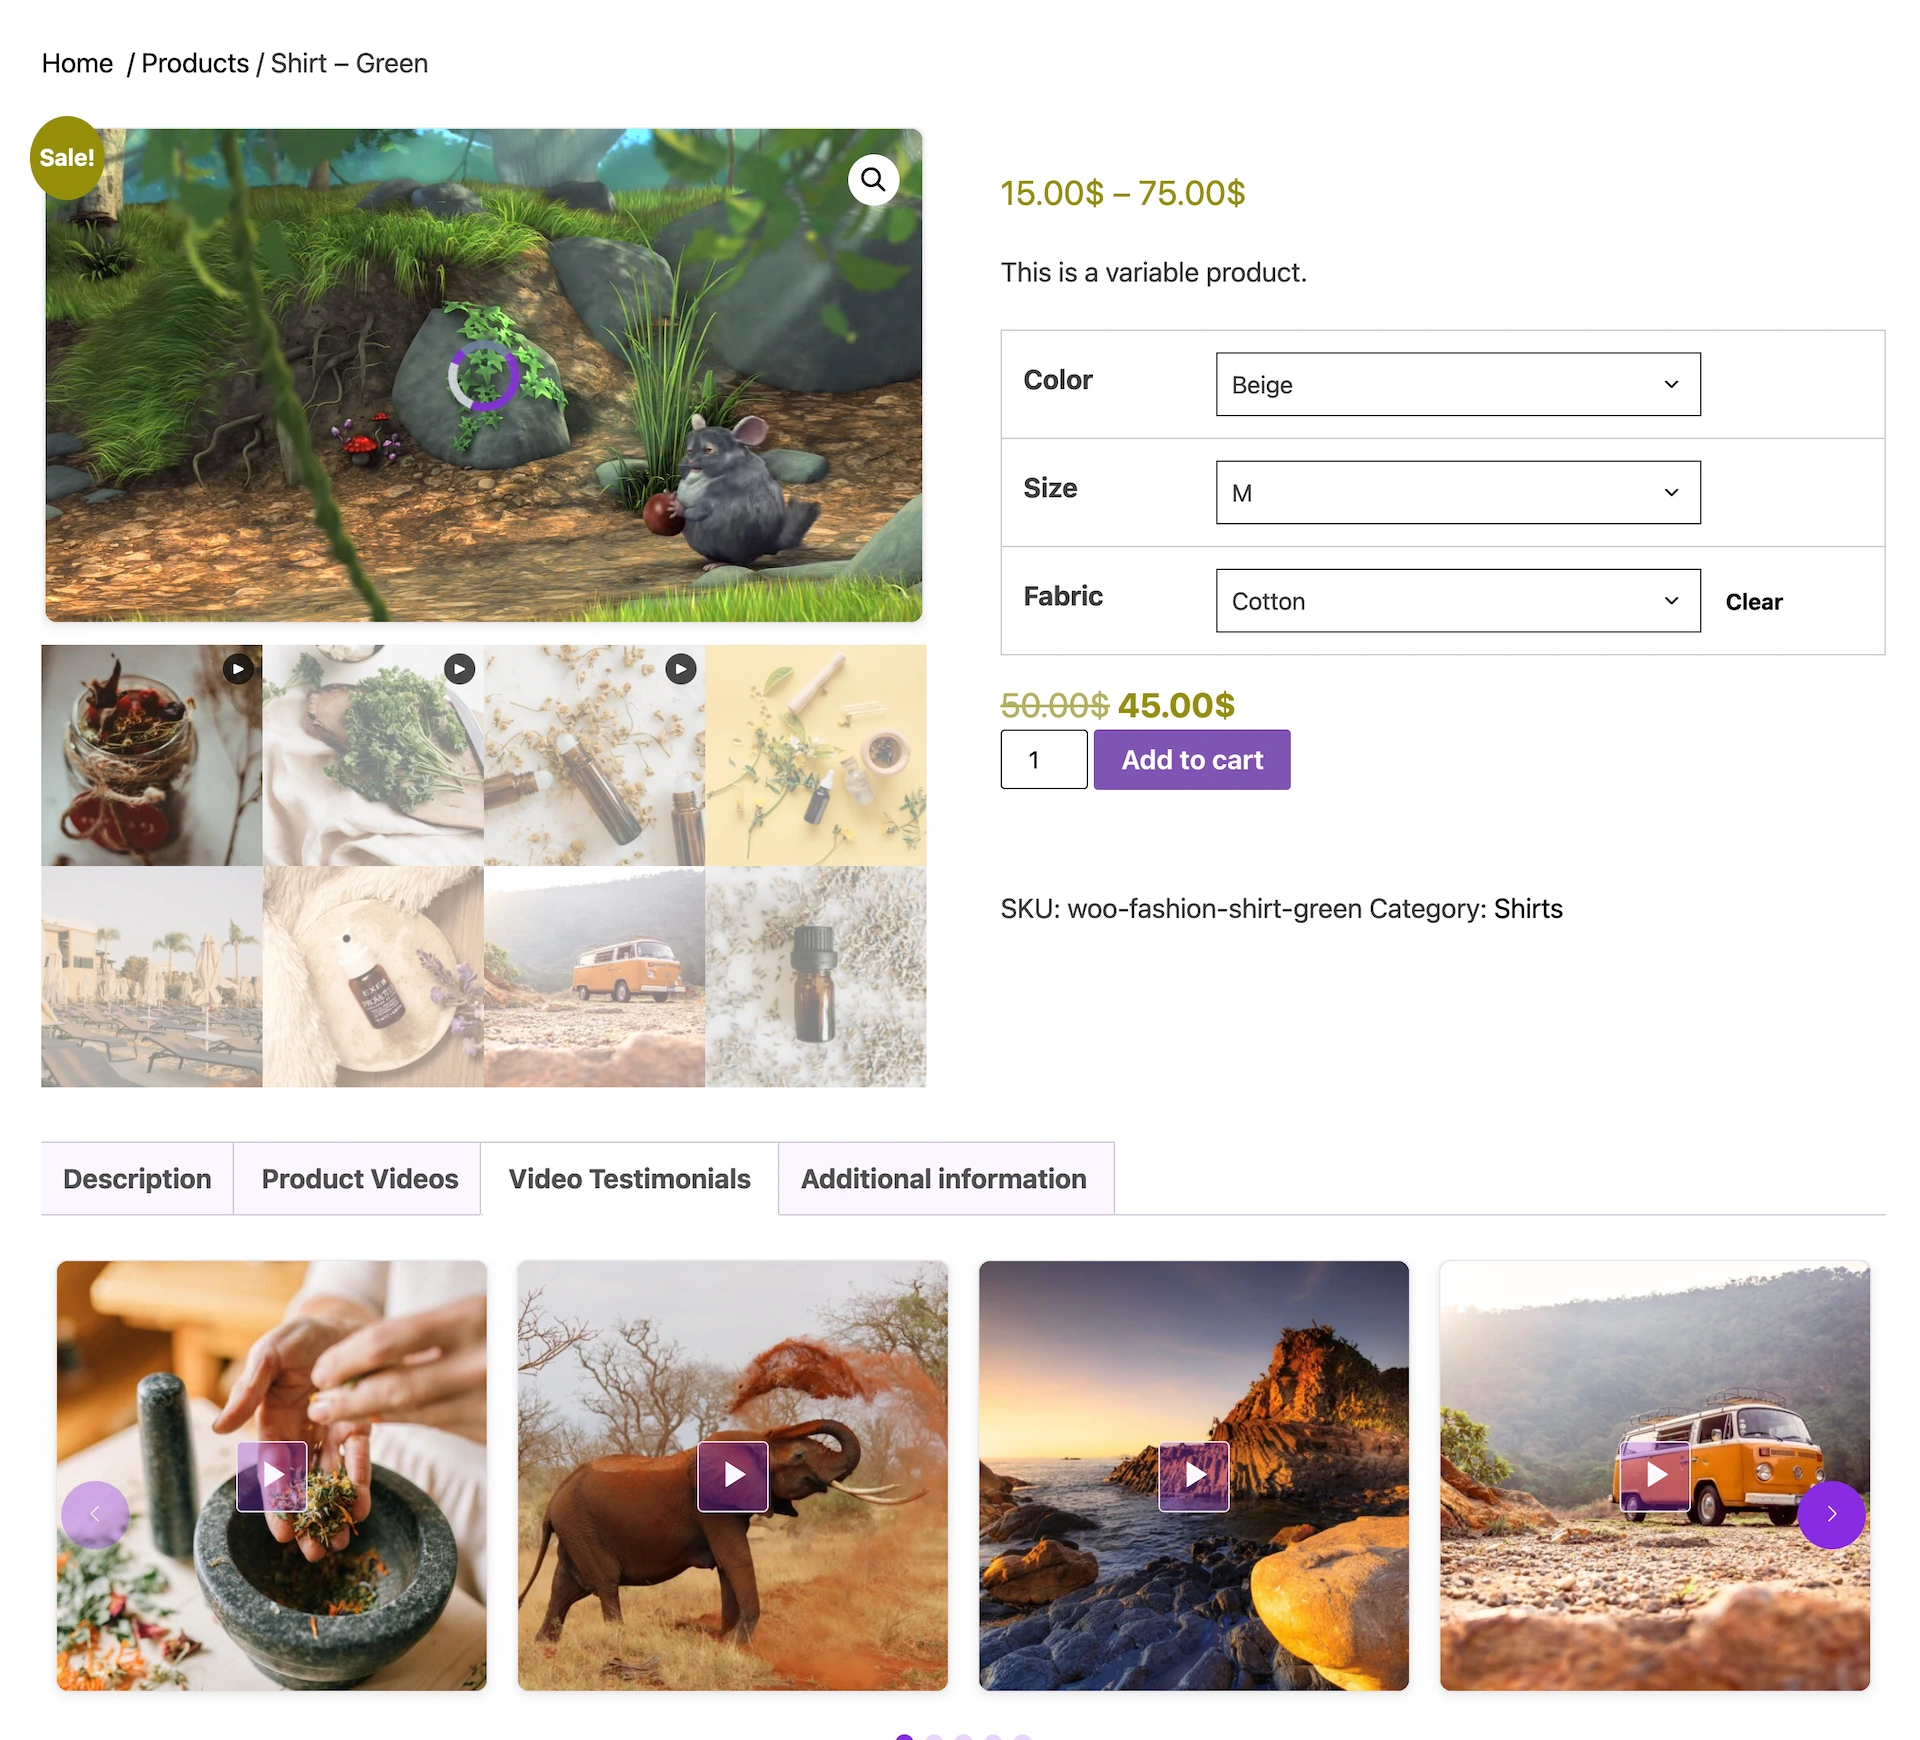
This guide walks you through configuring MediaHaven to automatically embed a responsive video carousel or grid directly into a custom tab on your WooCommerce product pages.
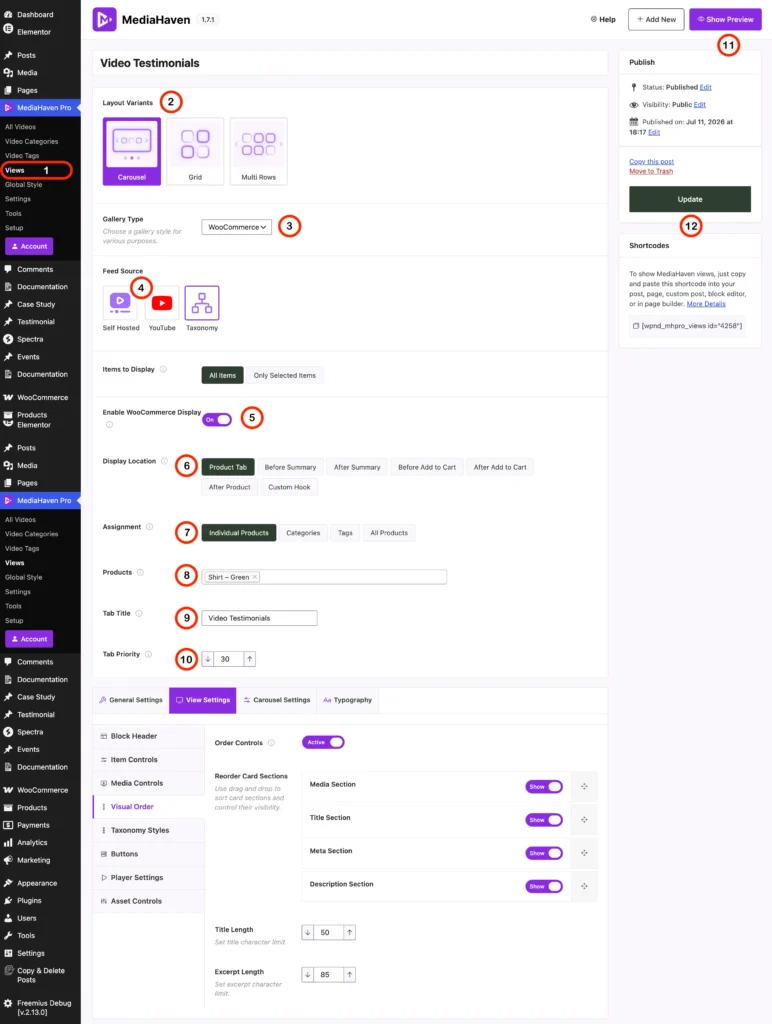
Step 1: Open the Views Manager
- Navigate to your WordPress admin dashboard.
- Go to MediaHaven > Views in the sidebar.
- Click Add New or select an existing view to edit.
Step 2: Choose Your Video Layout & Source
- Layout Variants: Select Carousel / Multi Rows for a swipeable horizontal slider, or Grid for fixed layouts.
- Gallery Type: Set this to WooCommerce to enable e-commerce specific triggers.
- Feed Source: Choose where your videos are pulled from:
- Self Hosted: Videos uploaded directly to your WordPress media library.
- YouTube: Streamed externally via YouTube links or playlists.
- Taxonomy: Loaded dynamically based on categories or tags (no recommended).
Step 3: Configure WooCommerce Tab Settings
To map the video player directly to your product page tabs, configure the following fields:
| Configuration Setting | Required Action / Value | Description |
| Enable WooCommerce Display | Toggle to On | Activates product page injection. |
| Display Location | Select Product Tab | Instructs the plugin to create a unique tab next to “Description” or “Reviews”. |
| Assignment | Select Individual Products | Restricts this specific video gallery to chosen items only. |
| Products | Search & select your product (e.g., “Shirt – Green”) | Links the layout to the exact product page. |
| Tab Title | Enter a custom title (e.g., “Video Testimonials”) | The public text heading customers see on the front-end tab. |
| Tab Priority | Enter a numeric weight (e.g., 30) | Determines the placement order of your tab (lower numbers appear first). |
Step 4: Customize the Interface Components
Under the View Settings > Visual Order tabs below the main setup area, you can further refine how the elements appear inside the tab:
- Order Controls: Toggle to Active to arrange elements.
- Reorder Card Sections: Click and drag the handles to arrange the sequence of your media card layers (Media Section, Title Section, Meta Section, Description Section), or toggle them to Show / Hide.
- Character Limits: Refine text layout spaces by capping the Title Length and Excerpt Length lengths to standard text constraints.
Step 5: Save and Publish
- Preview Your Changes: Click the Show Preview button in the top right to verify the alignment and card structure layout.
- Publish / Update: Click the Update button on the right sidebar panel to push the configuration live.
- Alternative Deployment: If you ever need to manually place this exact gallery layout somewhere else (like an Elementor layout or an arbitrary post text body), copy the unique shortcode string generated in the sidebar panel:
[wand_mhpro_views id="4258"].