

Adding a dedicated video block to a SaaS product hero section or replacing standard WooCommerce gallery images with a seamless video element can dramatically improve user engagement and conversion rates.
This step-by-step guide explains how to configure a clean, minimal Single Video Gallery using MediaHaven. By following these steps, you will remove all titles, descriptions, buttons, and metadata, leaving only the video player visible. See WooCommerce Live Demo
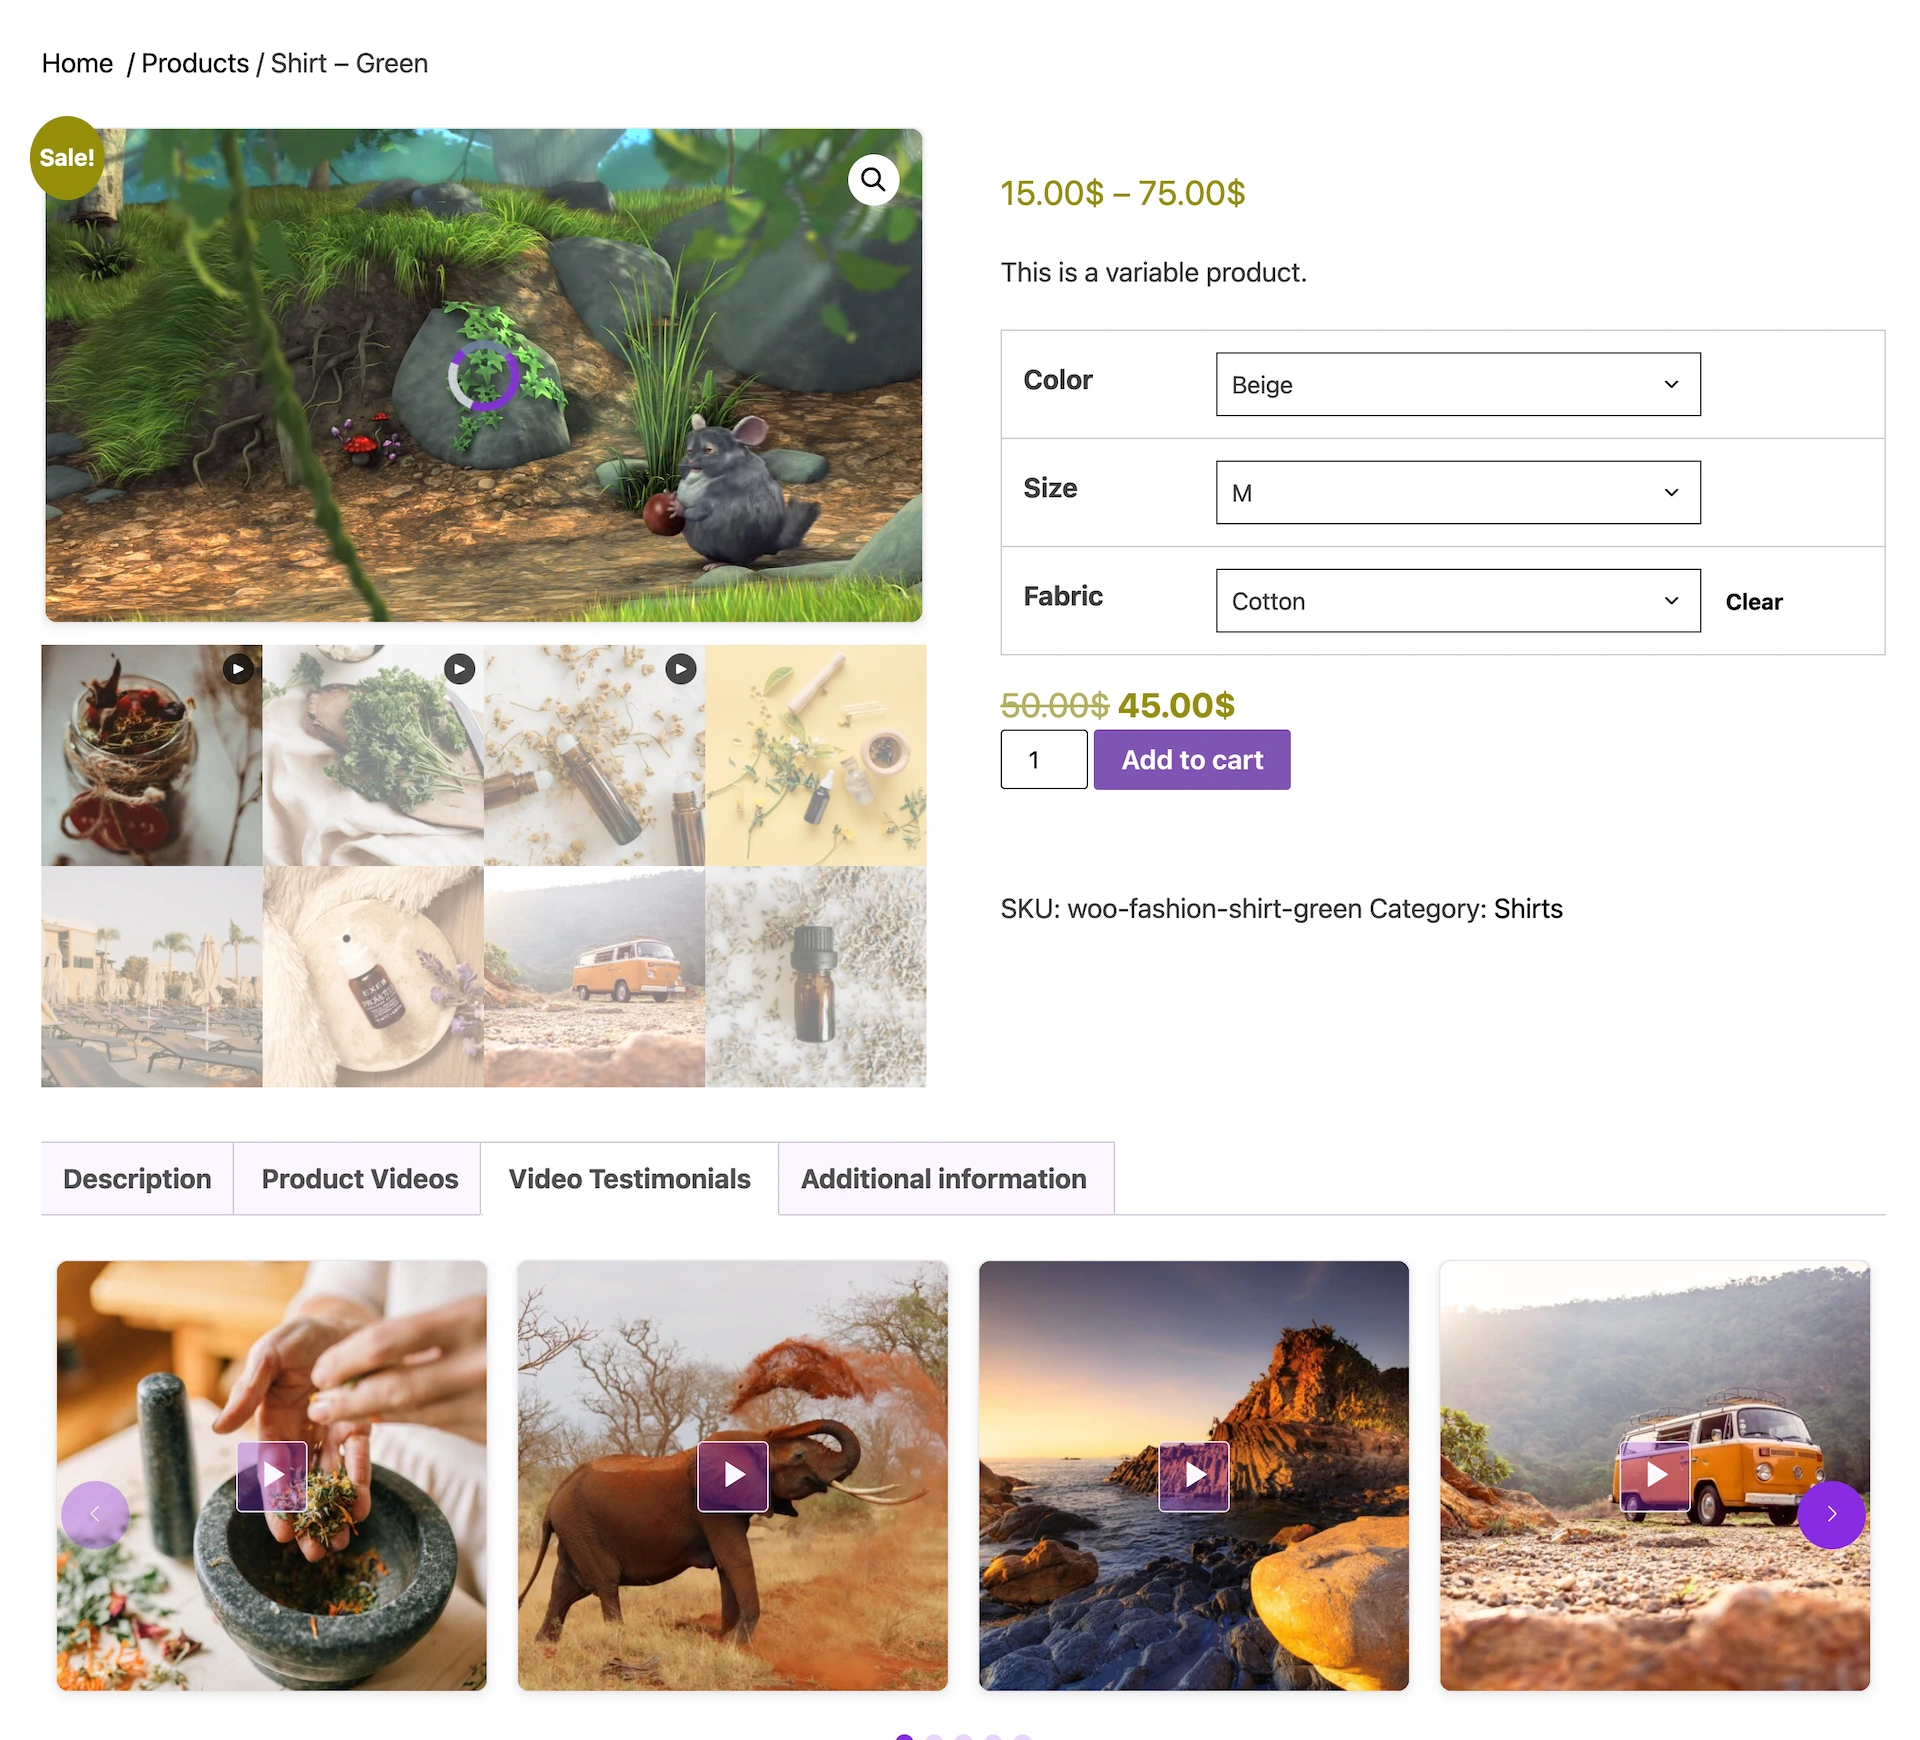
Before You Start
Make sure you have:
- WordPress installed
- MediaHaven activated
- At least a few videos ready: Add Your First Video and Configure External Video Sources
Dashboard Settings Reference Matrix
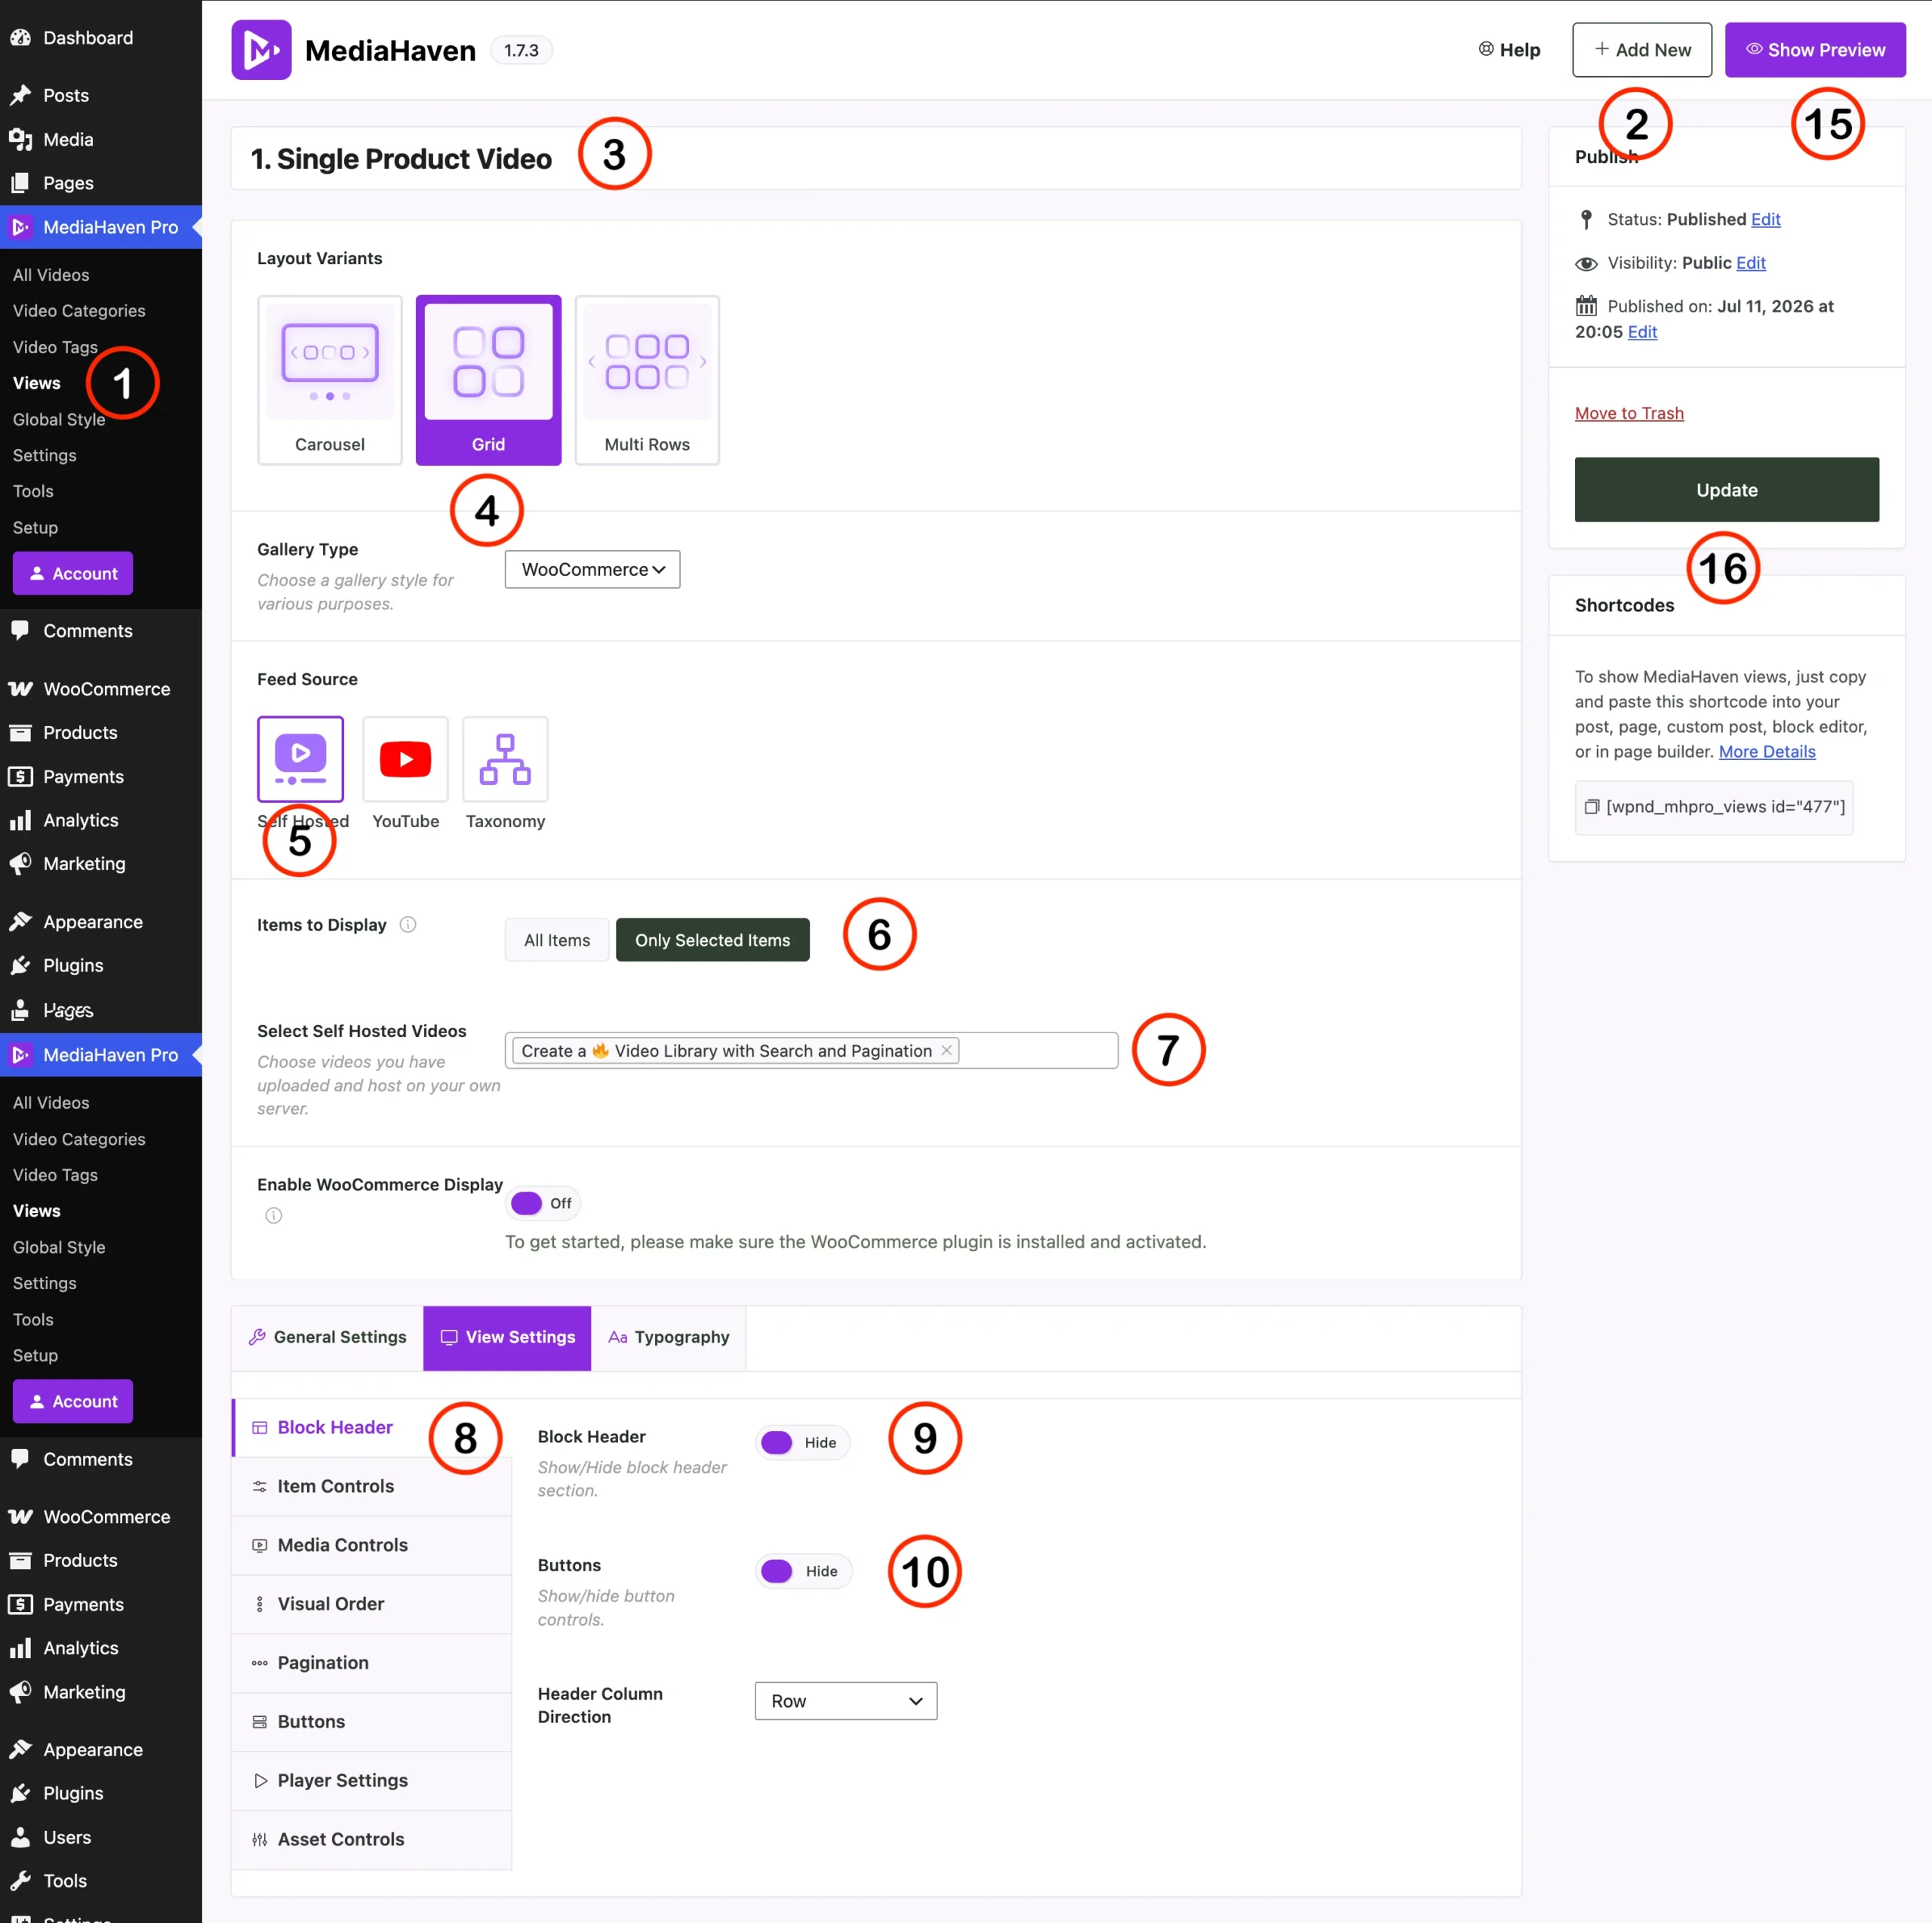
| Marker | Setting / Control | Purpose for Minimal Video Layout |
| ① | Views Configuration Menu | The root navigation tab inside MediaHaven Pro to build or edit your custom layout presentations. |
| ② | Create New Gallery | If you want to create new video gallery. |
| ③ | Gallery View Title | Name your view (e.g., “Single Product Video”) for easy internal organization. |
| ④ | Layout & Gallery Type | Selects the physical formatting system and drops down targeting hooks like WooCommerce. |
| ⑤ | Feed Source Selector | Choose between hosting your video locally (Self Hosted) or pulling external streams (YouTube). |
| ⑥ | Items to Display Filter | Toggle to Only Selected Items to isolate and render exactly one video asset. |
| ⑦ | Video Asset Query Dropdown | Search field to select the specific video file you want to use from your library. |
| ⑧ | Block Header Configuration | Menu tab targeting global styling components located above the video grid display. |
| ⑨ | Block Header Toggle | Set to Hide: Disables global gallery titles and subtitle descriptions. |
| ⑩ | Header Buttons Toggle | Set to Hide: Removes extra filter navigation buttons or control anchors. |
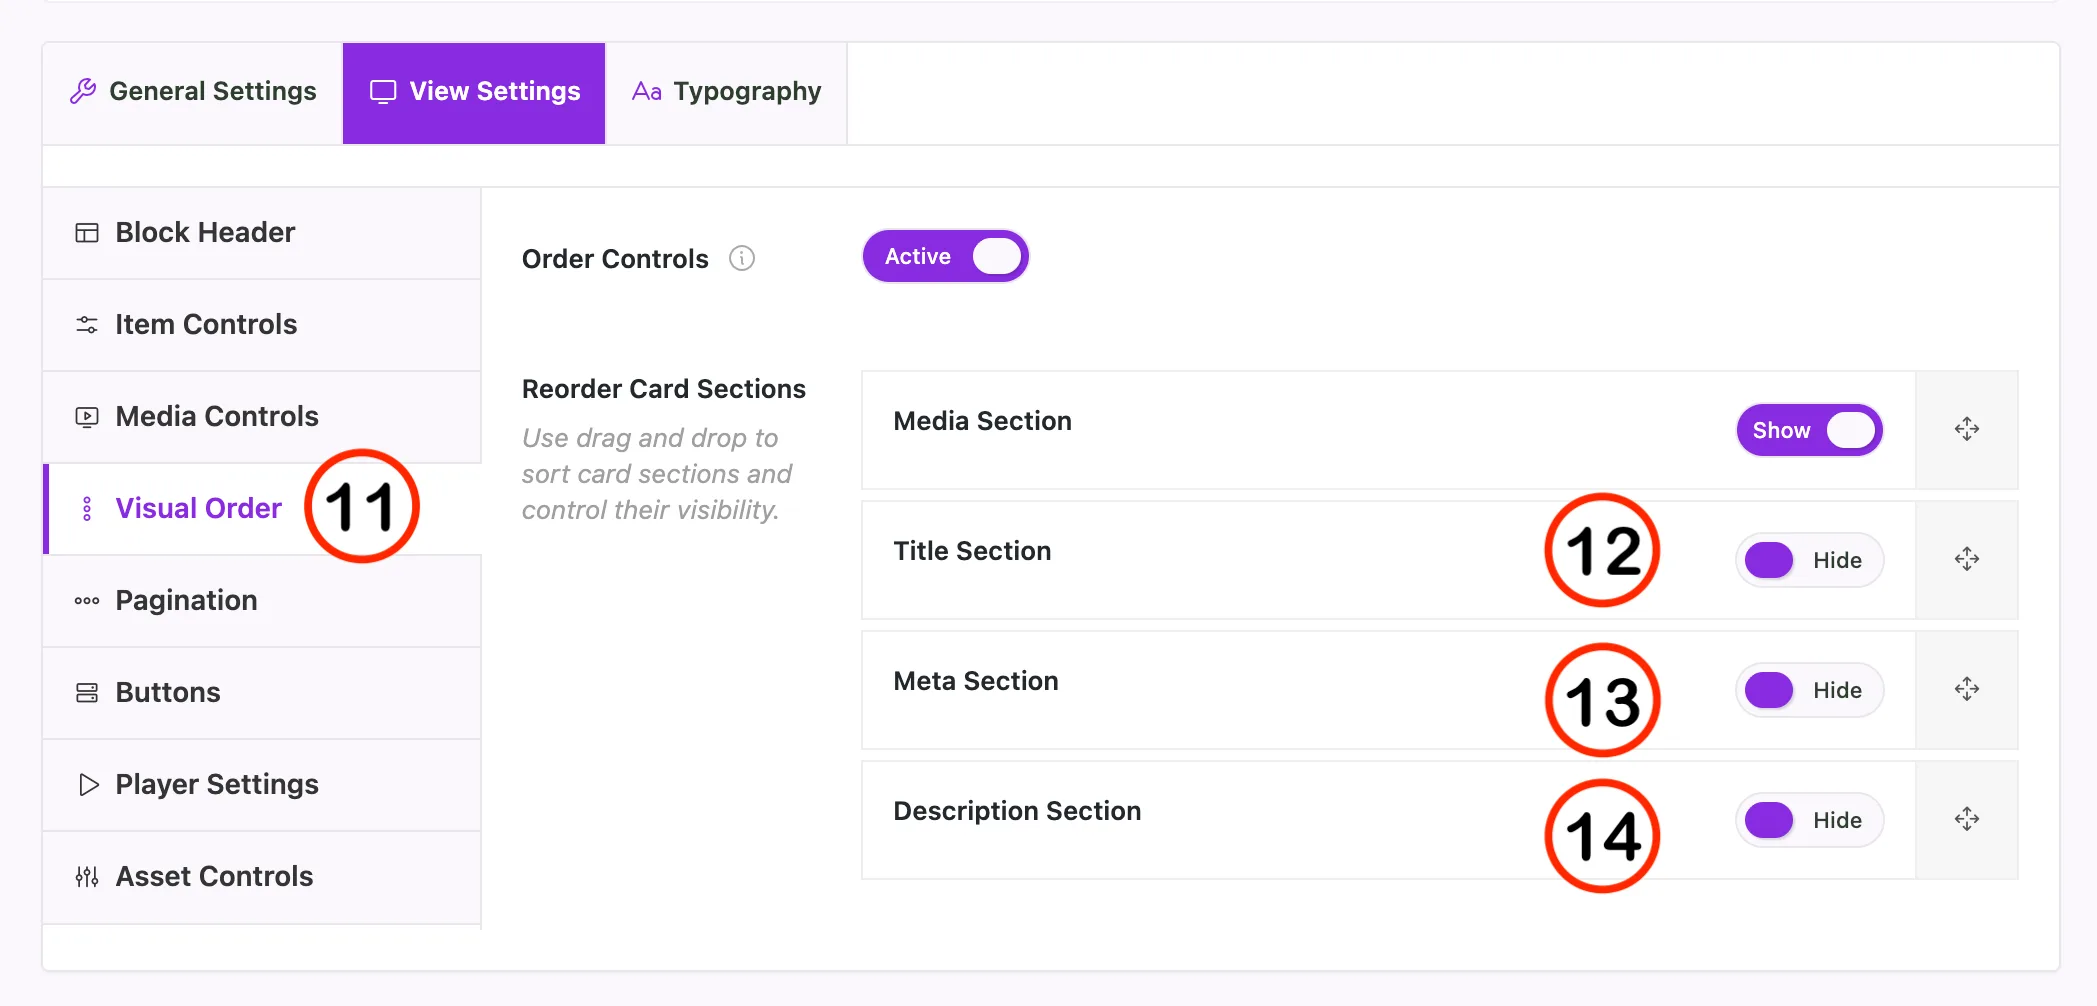
| ⑪ | Visual Order Tab | Sub-panel control handling card layouts via drag-and-drop structural layers. |
| ⑫ | Title Section Layer | Set to Hide: Removes the dedicated video file title text within the card container. |
| ⑬ | Meta Section Layer | Set to Hide: Disables date stamps, author tags, and viewing statistics. |
| ⑭ | Description Section Layer | Set to Hide: Disables excerpt text fields and extended video summary writing. |
| ⑮ | Show Preview Mode | Direct diagnostic button to open and review the layout output in a visual frame. |
| ⑯ | Shortcode Deployer Widget | Contains the unique copy-paste text shortcode needed to link the single view to your shop layout. |
Step-by-Step Setup: Stripping Everything Except the Video
Step 1: Base Configuration & Asset Selection
- Navigate to MediaHaven → Views (①). Click “Add New” or edit your current container layout.
- In the text area, give your gallery a recognizable title like
Single Product Video(③). - Under Layout Variants, choose Grid (④). In the Gallery Type dropdown, select WooCommerce if assigning this directly to an ecommerce store template.
- Go to Feed Source (⑤) and choose either Self Hosted (if the file is in your WordPress Media Library), Cloud or YouTube.
- Switch the Items to Display option (⑥) to Only Selected Items or All Items.
- Click the search bar (⑦) and choose the single video file you intend to place in your SaaS layout or product gallery images.
Step 2: Hiding Global Layout Headers
To eliminate overarching page clutter and make the player appear native to your hero component:
- Scroll down to the bottom configuration tabs and click the View Settings tab, then select the Block Header options (⑧).
- Switch the Block Header slider (⑨) to Hide. This stops your internal workspace title from displaying on the public front end.
- Switch the Buttons slider (⑩) to Hide to clear away unnecessary layout control options.
Step 3: Customizing the Card DOM to Show Only Video
Now you must strip out the micro-copy attached directly to the video card itself using the card reorder settings:
- Click the Visual Order tab (⑪) inside the left menu sidebar.
- Ensure Order Controls is set to Active.
- Leave the Media Section set to Show. This keeps your primary video window/thumbnail visible.
- Set the Title Section (⑫) to Hide.
- Set the Meta Section (⑬) to Hide.
- Set the Description Section (⑭) to Hide.
Plaintext
[ Card Content Stack Output ]
 ├── ✅ Media Section (Video / Thumbnail Player Visible)
 ├── ❌ Title Section (HIDDEN)
 ├── ❌ Meta Section (HIDDEN)
 └── ❌ Description Section (HIDDEN)
Step 4: Saving and Deploying
- Click the green Update or Publish button (②) in the top right control card to save your custom view.
- You can check your progress visually using the Show Preview selector (⑮).
- Move down to the Shortcodes dashboard widget (⑯) and click the copy icon on the shortcode snippet string (e.g.,
).
Integrating with SaaS Hero Sections & WooCommerce
For WooCommerce Gallery Replacement:
Look over to the right-hand sidebar panels to attach your media layout:
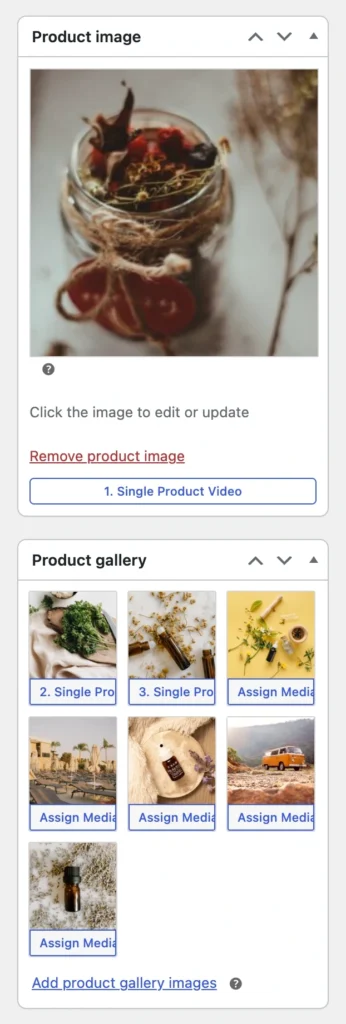
- Locate the Media Panels: Look for the Product image or Product gallery meta boxes on the right side of your screen.
- Launch the Selector: Click the Assign MediaHaven Gallery button located directly inside these image boxes.
- Select Your Gallery: In the Select Gallery popup window that appears, use the search bar or list to choose the specific video layout you want to display for this product.
How to Create a WooCommerce Product Video Gallery (Replacing Default Images)
For SaaS Product Hero Blocks:
Drop the shortcode clean into your theme container’s top header block section. Because all text parameters are completely hidden, it renders as a responsive raw video element, blending with your custom CSS grids or flexboxes.