

⚠️ Prerequisite Notices:
- Install WooCommerce: You must have the WooCommerce plugin installed and activated on your WordPress site. If WooCommerce is missing, the product editing screens and options shown below will not be available.
- Create a Video Gallery First: Before assigning a gallery to a product, you must first create your video gallery layout inside the main MediaHaven settings. If you haven’t created one yet, follow our step-by-step guide: How to Create a Professional Video Gallery in WordPress with MediaHaven.
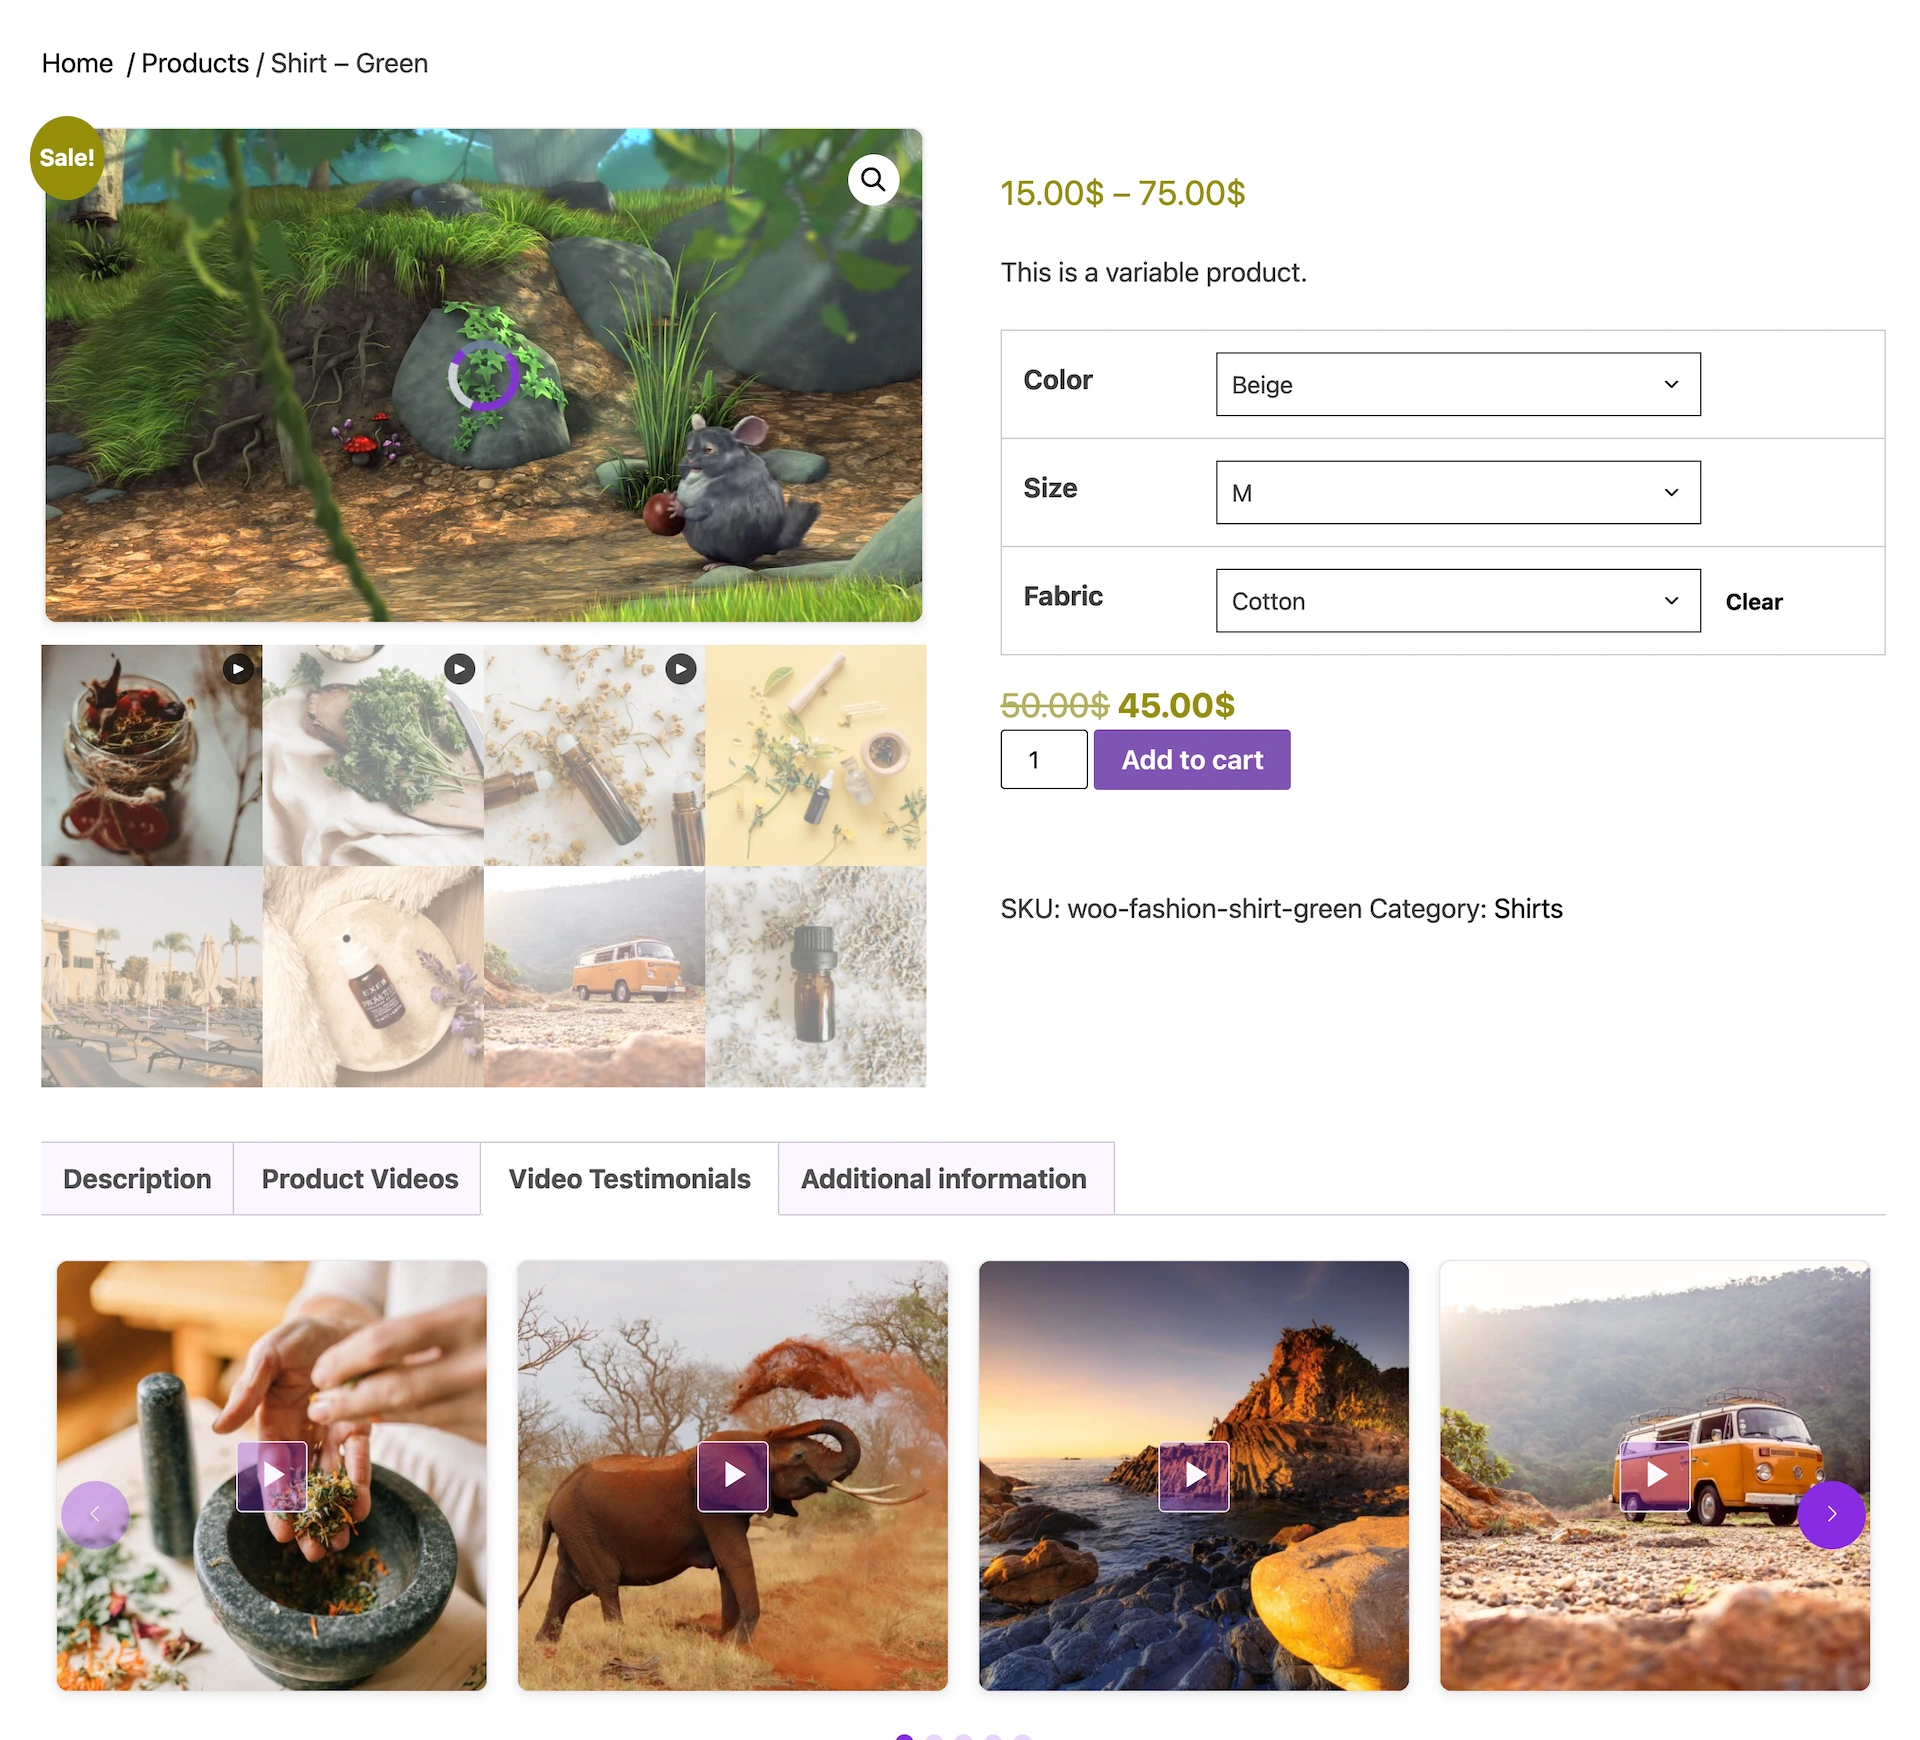
This guide walks you through configuring MediaHaven Pro to create a responsive video gallery that replaces or enhances the default static image gallery on your WooCommerce product pages.
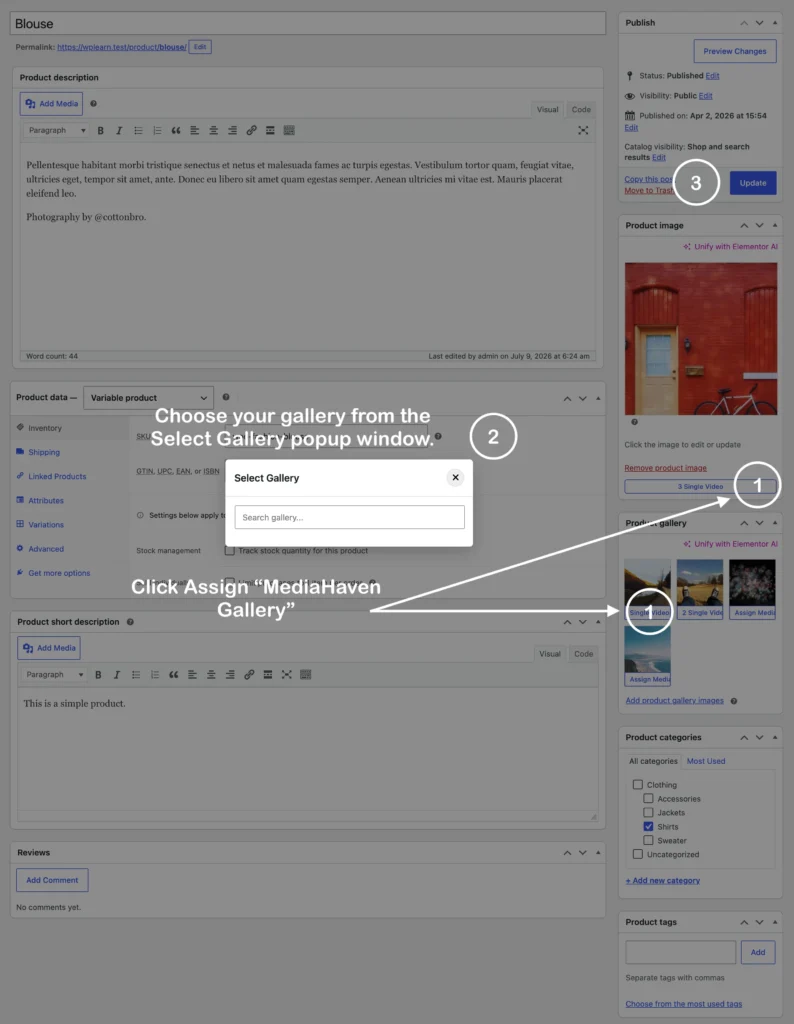
Step 1: Open the Product Editor
- Go to your WordPress admin dashboard.
- Navigate to Products > All Products and click on the product you want to edit (e.g., Blouse).
Step 2: Assign the Video Gallery
Look over to the right-hand sidebar panels to attach your media layout:
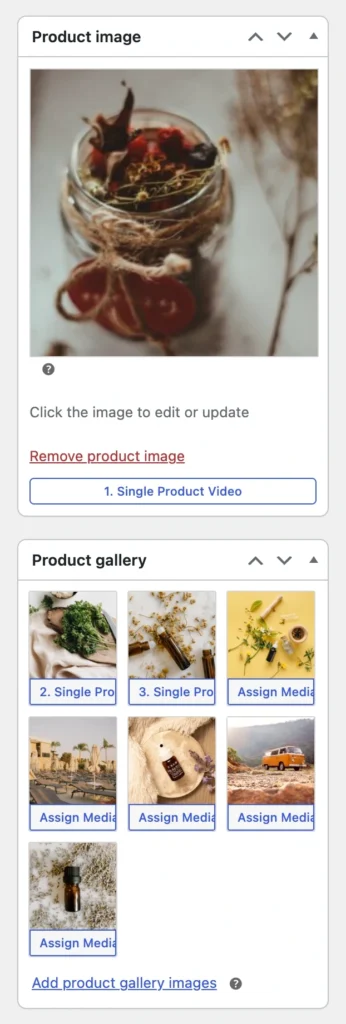
- Locate the Media Panels: Look for the Product image or Product gallery meta boxes on the right side of your screen.
- Launch the Selector: Click the Assign MediaHaven Gallery button located directly inside these image boxes.
- Select Your Gallery: In the Select Gallery popup window that appears, use the search bar or list to choose the specific video layout you want to display for this product.
Step 3: Save Your Changes
- Scroll back up to the Publish meta box at the top right of the editor.
- Click the blue Update button to save your configurations and push the video gallery live to the front-end product page.
See it work in real-time—try the live demo now.