This guide walks you through creating and publishing a video using the MediaHaven video system inside WordPress.
The process includes:
- Publishing the video
- Creating the video entry
- Configuring video details
- Adding video source and subtitles
Create a New Video
- Go to WordPress Dashboard → MediaHaven -> All Videos -> Add New Video
- Click Add New Video
- Enter the Video Title
- (Optional) Add an excerpt or description in the editor
Configure Video Settings
Inside the Video Settings panel you’ll find general video metadata.
Layout Variant
Choose how the video appears on the frontend.
- Standard → Default layout for single video display
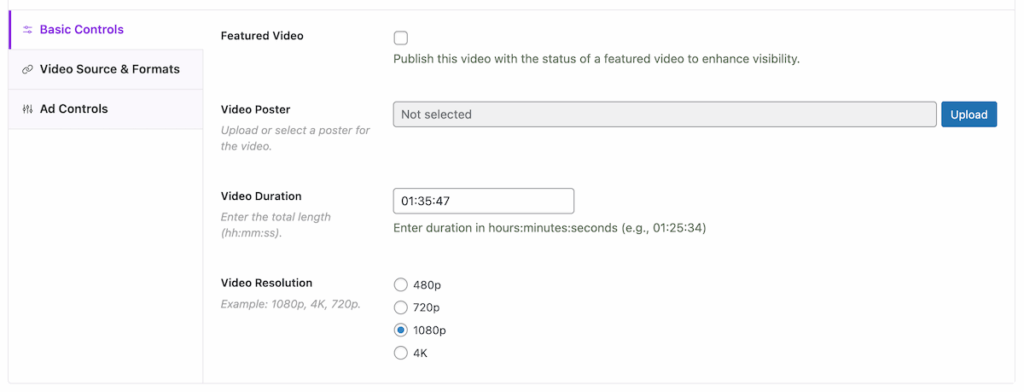
Basic Controls
Featured Video
Enable this option to highlight the video in listings or featured sections.
Use when:
- Promoting important content
- Showing priority videos in grids or sliders
Video Poster
Upload a poster image shown before playback.
Best practice
- Use a high-quality thumbnail
- Same aspect ratio as video player
Steps:
- Click Upload
- Select or upload an image
- Save selection
Video Duration
Enter total length in format:
hh:mm:ss
Example: 01:25:34
This helps with:
- Display metadata
- Sorting/filtering videos
- User expectations
Video Resolution
Select the primary quality of the video:
- 480p
- 720p
- 1080p
- 4K
This value is used for:
- Display badges
- Filtering
- UI labeling
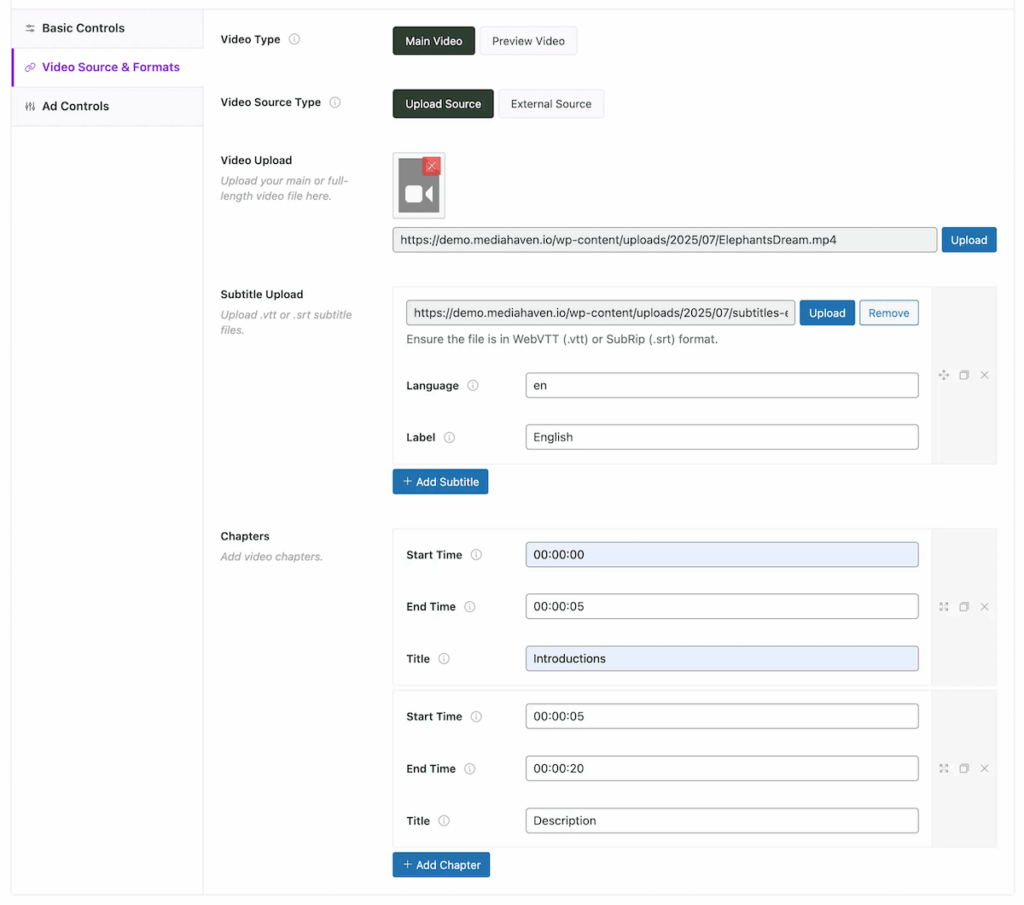
Configure Video Source & Formats
Go to the Video Source & Formats tab.
Video Type
Choose how the video is used:
Main Video
Primary full video shown in player.
Preview Video
Short teaser or preview clip.
Video Source Type
Choose where the video is hosted.
Upload Source
Use a self-hosted video file.
✔ Recommended when:
- You want full control
- Using MediaHaven player features
- Hosting on your server or CDN
External Source
Use third-party platforms (YouTube, Vimeo, etc.)
Upload Video File
- Just select any Video Source
- Enter the source URL into the Video External Source field. Ensure the link matches the required format shown in the placeholder to pass validation.
Add Subtitles (Optional but Recommended)
MediaHaven supports multi-language captions.
Supported Formats
- WebVTT (.vtt)
- SubRip (.srt)
Steps to Add Subtitles
- Click Upload under Subtitle Upload
- Select subtitle file
- Fill in:
- Language code (example:
en) - Label (example: English)
- Language code (example:
- Click Add Subtitle
You can add multiple subtitle tracks.
✔ Benefits:
- Accessibility
- SEO
- International users
- Better engagement
Chapters (Optional)
Use chapters to divide long videos into segments.
Steps:
- Click Add Chapter
- Define chapter time and title. Ensure the time required format shown in the placeholder to pass validation.
✔ Useful for:
- Tutorials
- Courses
- Long presentations
- Documentation videos
Publish the Video
After configuring all settings:
- Review video information
- Set a video thumbnail (optional)
- Select categories if available
- Add relevant tags to improve content discoverability.
- Click Publish
Your video is now available in:
- Video Library listings
- Query blocks or shortcodes
- Player layouts
- Frontend templates